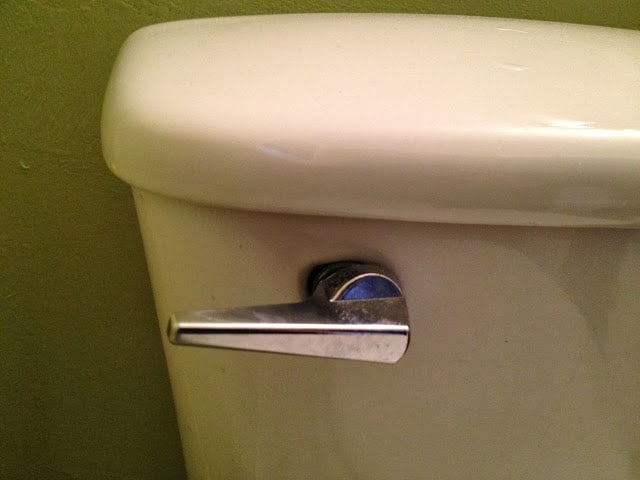
Here’s a repair anyone can do and I cannot imagine how much a plumber would charge for this. Recently the toilet handle/lever of our first-floor toilet began hanging up after you have flushed and then the water runs until I catch it. I don’t like paying the City of Chicago any more than I must so this needs to get fixed and you don’t want to waste water anyway. Anyway, here’s how to replace yours… This tutorial will cover 90% of all toilets but there are some unique ones out there that are totally different, in that case you’ll have to figure it out yourself.
Hardware:
- Typical toilet
- Chrome front side flusher handle (right angle version)
Parts to Order:
- Replacement Flusher handle: Master Plumber 606715 MP Plastic Toilet Flush Lever
Tools Needed:
Step 1: Determine the type of flusher handle/arm you have.
The main question about the type is whether it is mounted on the front or the side of the tank. Most are mounted on the front.
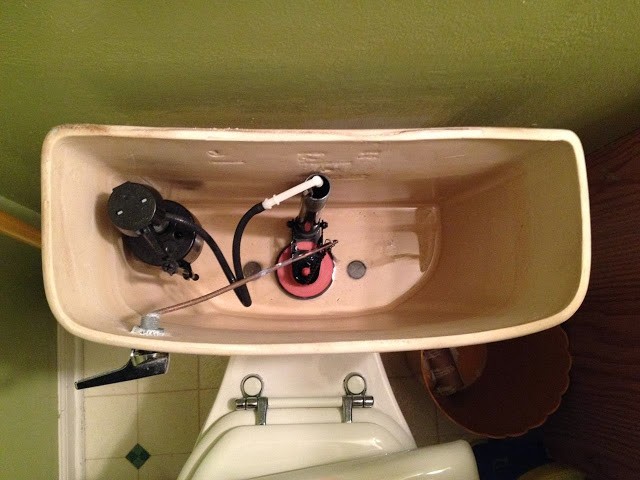 |
| Our empty toilet tank |
Step 2: Get a replacement flusher handle/arm.
I ordered mine with my prime membership on amazon.com and got it for $10.71. This is the one I chose here. The arm seems to be a little short but it doesn’t really matter that much–it will work fine.
Step 3: Shut the water valve off below the toilet and flush to drain the tank.
It’s either that or dip your hands into the nice cool refreshing water of your toilet tank. It’s clean, not consumption grade, but not really pleasant to reach into if you don’t need to. Once the tank is drained it’s easier to work with the flapper chain, etc. Be careful not to use too much force when closing/opening this valve for you could damage it. This particular one has a plastic shaft running from the handle to the valve (and must be turned 1.5-2 times to turn on/of) where the newer ones in our home are all metal and only take a quarter turn. Turn it clockwise to turn it off.
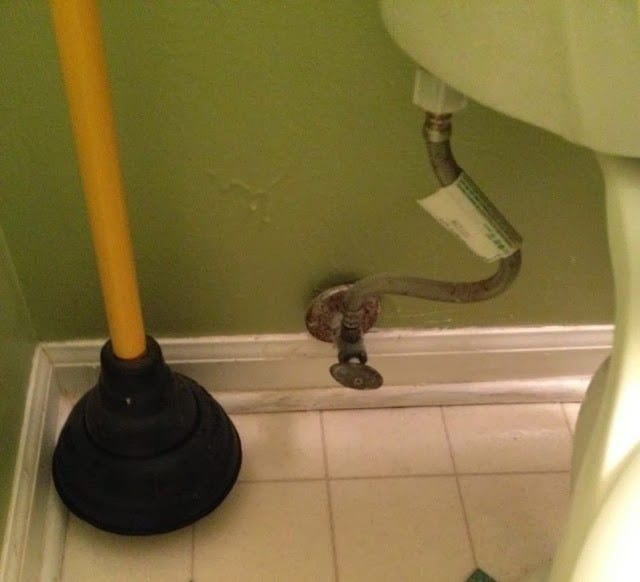 |
| The cold water toilet tank valve |
Step 4: Disconnect the flapper chain from the flusher arm.
There’s most likely a little hook on the end of the chain or plastic cord that hooks through a hole in the flusher arm.
Step 5: Loosen the flusher handle nut on the inside of the tank.
Be careful not to tighten, you could actually break your tank. Normally it is counter-clockwise to loosen but these nuts are reverse threaded for some reason. I used a channellock pliers to remove the nut but you could use a Crescent-type wrench
or if you wanted to be very exact, an open ended wrench. Once it is completely off you can just thread it off the end of the arm and remove it.
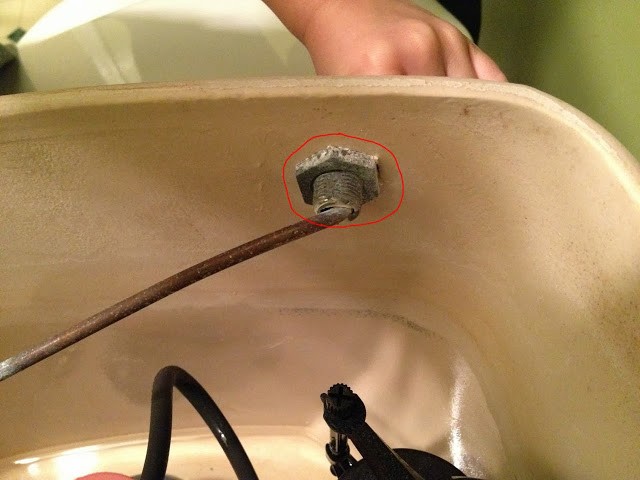 |
| The nut that holds the toilet flusher handle to the tank |
Step 6: Feed the old toilet flusher handle out the front of the tank and dispose.
Step 7: Install the new flusher handle.
Just insert the arm into the front hole of the tank and on in. Put the nut on from inside the tank. Hand tighten and then cinch down with your channel locks.
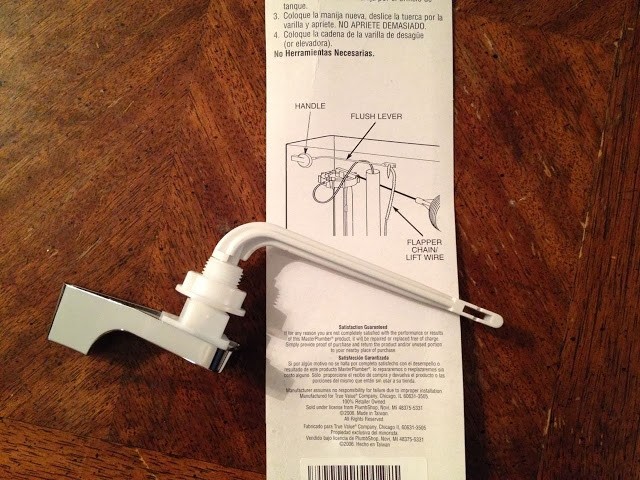 |
| Flusher handle out of the package. Take off the nut before you try to install it. |
Step 8: Connect the flapper valve chain and adjust the length of the chain so it flushes properly.
You need there to be some slack in the chain when you are not flushing it otherwise the flapper valve will be held open and the tank will continually drain and the water will run constantly.
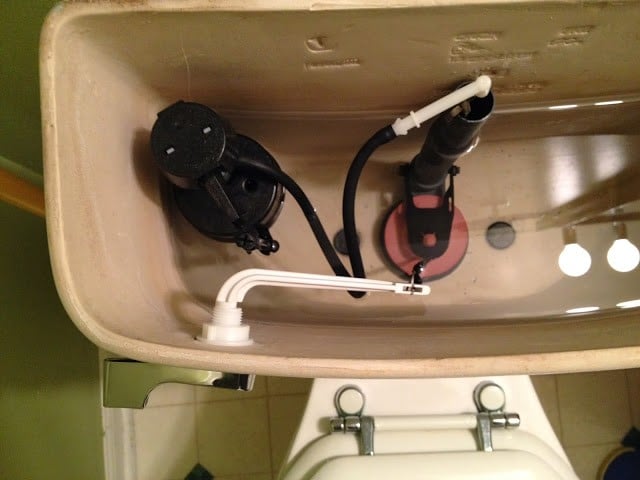 |
| The newly installed flusher handle |
Update:
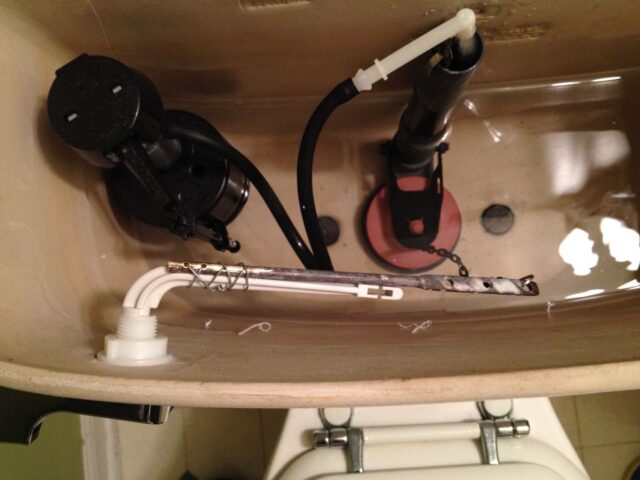
After playing around with the length of the flapper valve chain and having problems with the flusher arm wedging itself in the flush position against the angled underneath side of the tank lid I modified the new flusher handle so it had a longer arm. I was disappointed when I saw how short the flusher arm was when I received what I’d ordered. It should have worked but the angled top of my tank lid created the perfect situation for it to get wedged. I cut off the arm from the old flusher, drilled some holes in it, drilled holes to match on the new arm and attached it with some stainless steel wire. This was what the new and improved (and non-sticking):
Amazon Associate Disclosure: As an Amazon Associate I earn from qualifying purchases. This means if you click on an affiliate link and purchase the item, I will receive an affiliate commission. The price of the item is the same whether it is an affiliate link or not. Regardless, I only recommend products or services I believe will add value to Share Your Repair readers. By using the affiliate links, you are helping support Share Your Repair, and I genuinely appreciate your support.

