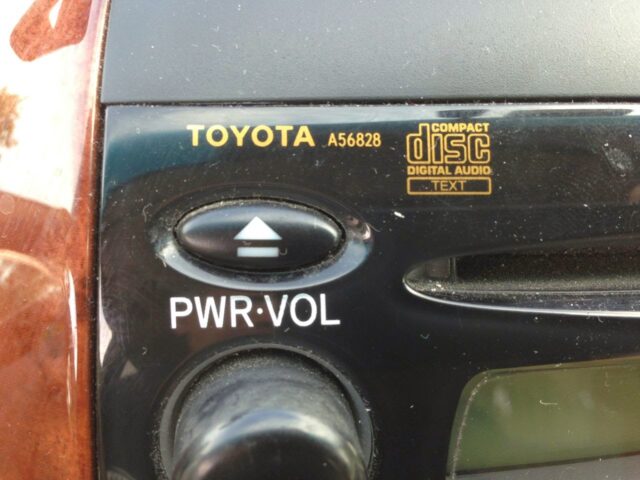
Our 2004 Toyota Sienna stereo began to fritz out on us. When you would press the right Audio Control button (for example to adjust the fade), sometimes the stereo would just shut off. Eventually we were unable to switch it to Auxiliary mode to listen to the audio of the DVD playing in the back–not good. I did figure out that I could get it into auxiliary mode by using the steering wheel controls but if I then tried to adjust the fade (to put the dvd audio in the back where the kids are) it would shut off and then I couldn’t get it to come back on. It came time to swap it out. I purchased a good used one off of ebay.com. I simply searched for the number on the front corner of the stereo, A56828:
 |
| Model number on top left of stereo |
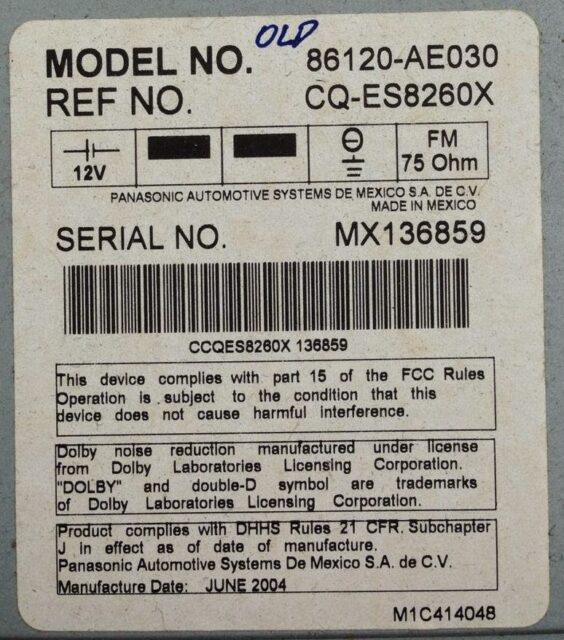 |
| Label on top of stereo: Toyota Stereo Model No. 86120-AE030 |
How to Replace the Stereo on 2004-2010 Toyota Sienna
Hardware:
Tools Needed For This Repair:
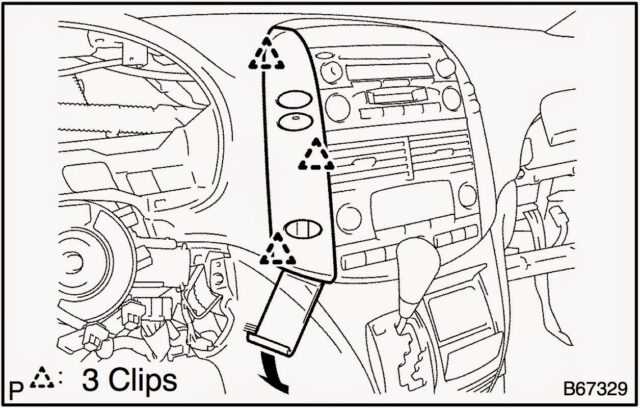
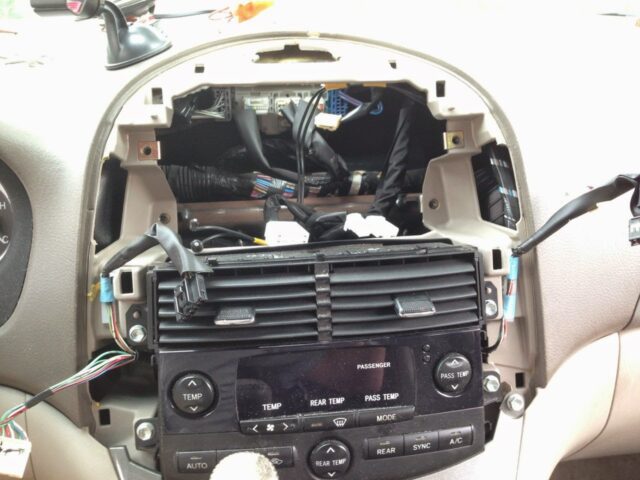
Step 1: Remove the vertical panels to the right and left of the stereo and climate control system.
The shop manual refers to them as “Instrument Cluster Finish Panel Center” No. 1 and No. 2. You remove them by prying up on the bottom edge of the panel. There is an official tool for doing this but my official tool is an electrical-tape wrapped flat-head screwdriver. If you want some real non-abrasive interior panel prying tools you can get them here. The thinner the better in order for you to be able to get it under the panel.
 |
| Removing panels on left and right sides of stereo and climate control panel |
I found that the best place to get under the panel is in the seam where the two pieces below meet:
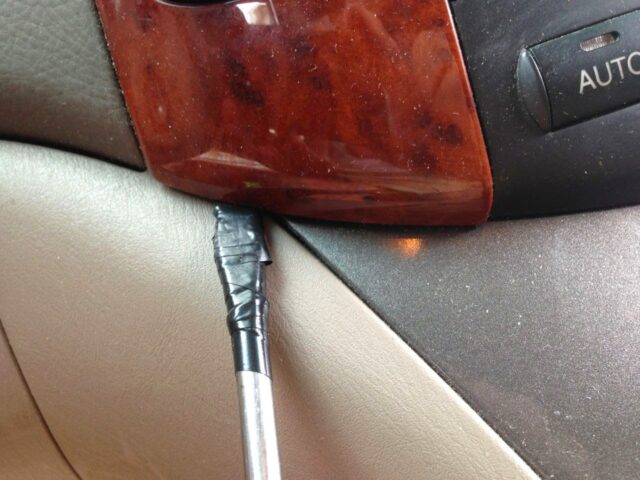 |
| Prying up the panel to the left of the stereo/climate control center |
Step 2: Disconnect the wiring from the side panel.
The left panel has two wiring connectors and the right one only has one. Each connector has a tab you must press in, in order to slide out the connector. Be careful not to pull on the wires but pull on the plastic connector.
 |
| Left Panel connector release tab locations |
 |
| Left Panel lower connector release tab location |
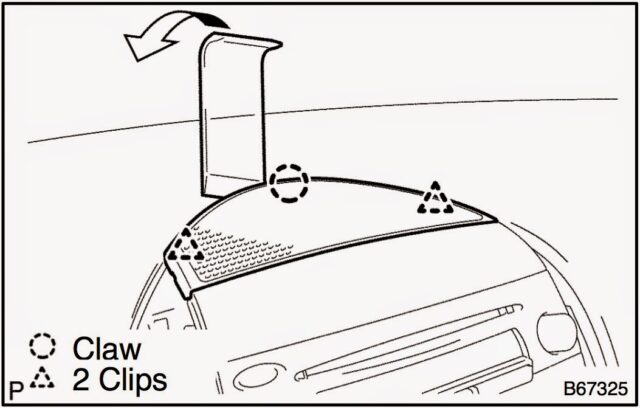
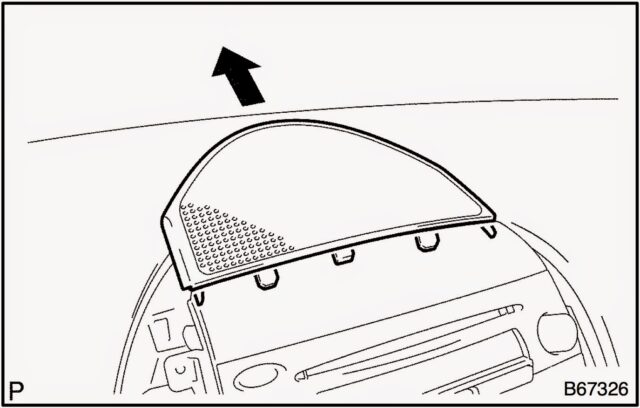
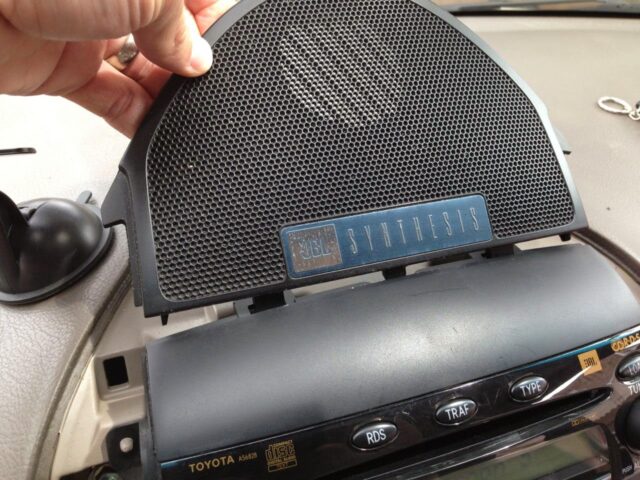
Step 3: Remove the center channel speaker grill panel above the stereo.
The shop manual refers to it as the “Instrument Cluster Finish Panel Garnish.” The panel sits down into the dash and tucks under on the bottom (rear) edge and snaps down on the top edge.
 |
| Prying up the center channel speaker grill above the stereo |
 |
| Prying up the top (center channel speaker) panel |
The front edge of the panel has three tongues that tuck into the top of the stereo so life tup the back edge and then pull the tongues out of their slots. Here I am lifting it up and out:
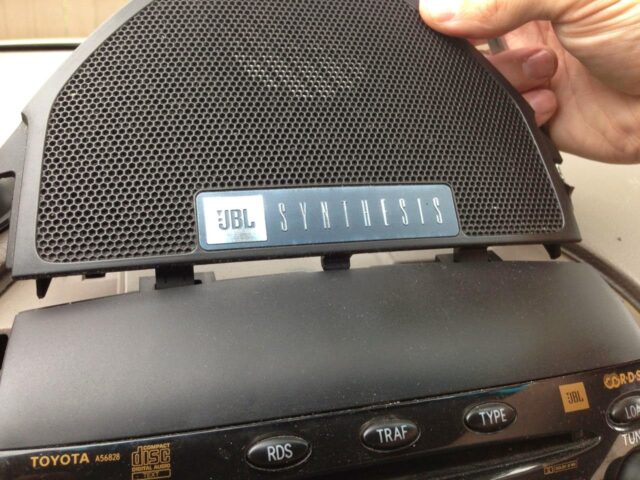 |
| Removing the top panel–you can see the tongues that slip down into the top edge of the stereo |
 |
| Removing the center channel speaker grill |
This panel didn’t pry up as easy as the two side ones because it sits straight down into the dash. I later learned that I had nicked a chunk out of the dash with my screw driver:
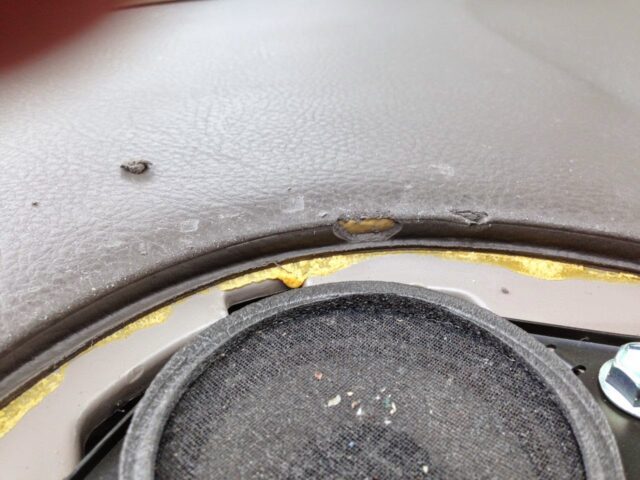 |
| Nick in dash I made when prying up the top panel |
Thankfully, you can’t see the nick when it is re-assembled though.
Step 4: Remove the center speaker.
There are two 10mm hex head nuts that secure it. If you need a 10-mm driver, get one here .
.
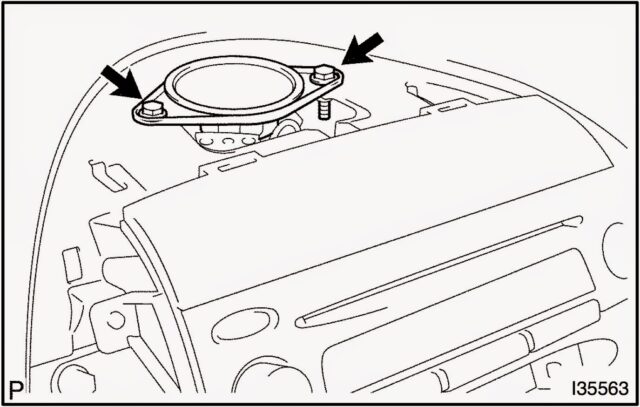 |
| Removing the center channel speaker |
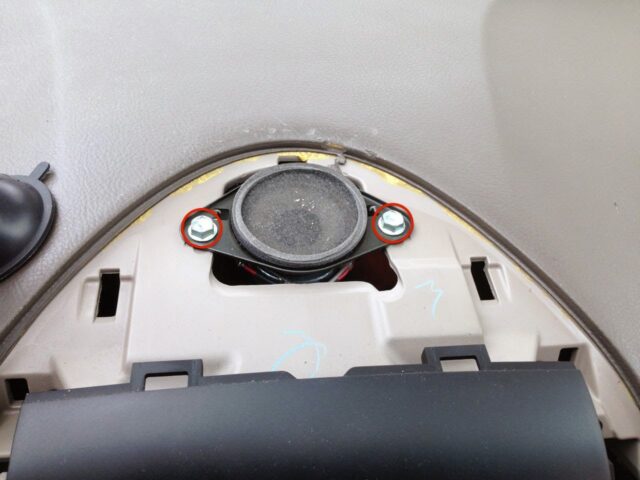 |
| Center Channel Speaker 10-mm nut head bolts |
Disconnect the speaker wiring harness. The connector on my van was wrapped in foam so I had to carefully peal it off. Press the tab down in order to release the wiring connector:
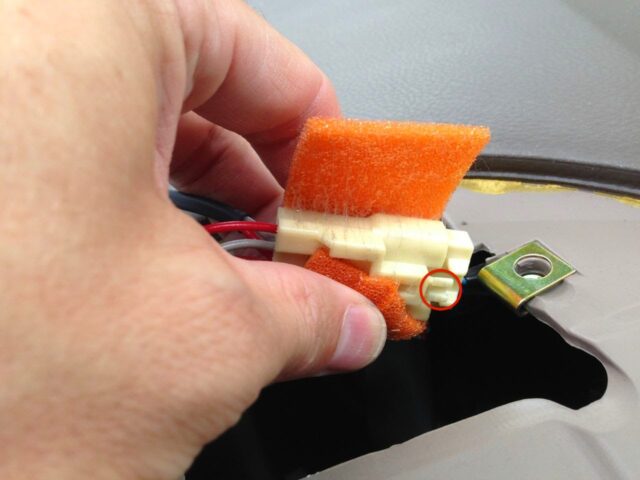 |
| Press the tab to release the speaker wiring connector |
Set the speaker and bolts aside.
Step 5: Remove the 4 10mm hex head nuts from the stereo receiver (2 on each side).
These 4 screws hold the stereo in place via the bracket that is screwed to each side of the stereo.
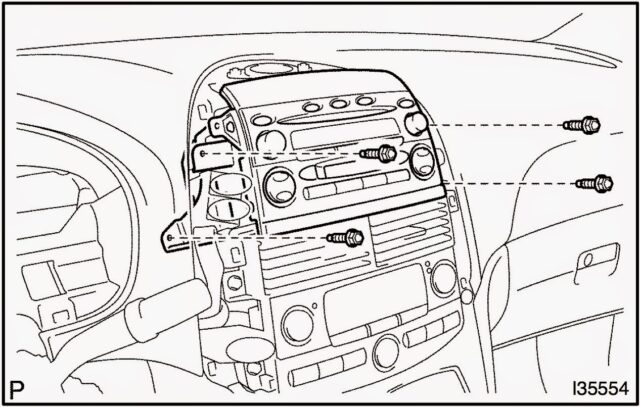 |
| Removing the 4 bolts that mount the stereo in the dash |
Here’s what the bolt locations look like in real life:
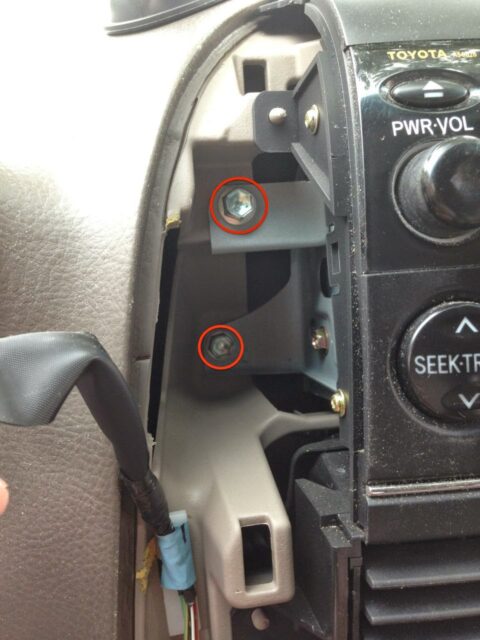 |
| Left stereo mounting bolt locations |
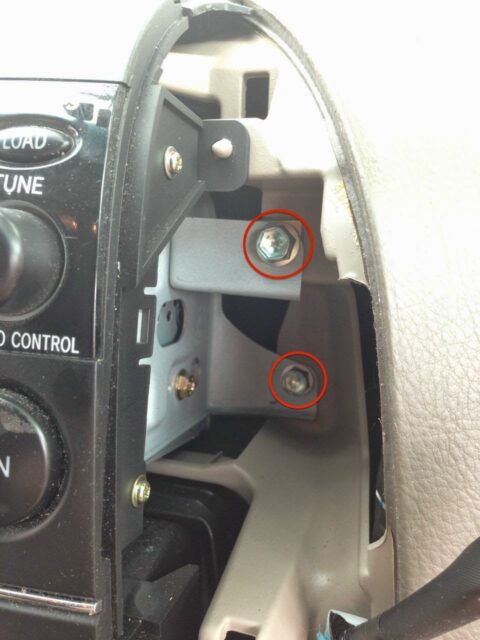 |
| Right stereo mounting bolt locations |
FYI: The stereo stays in place once you remove the bolts.
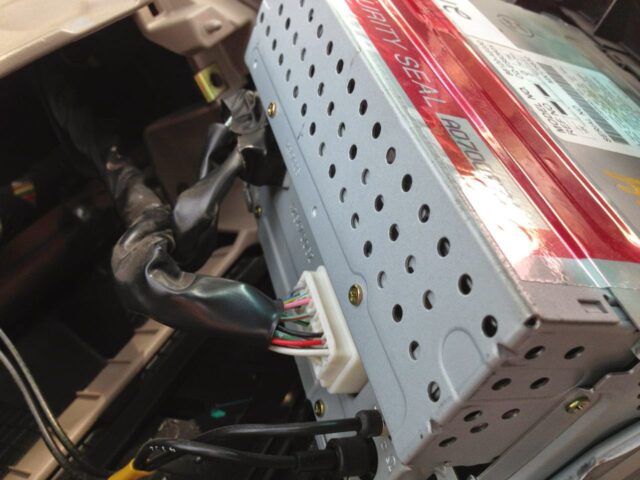
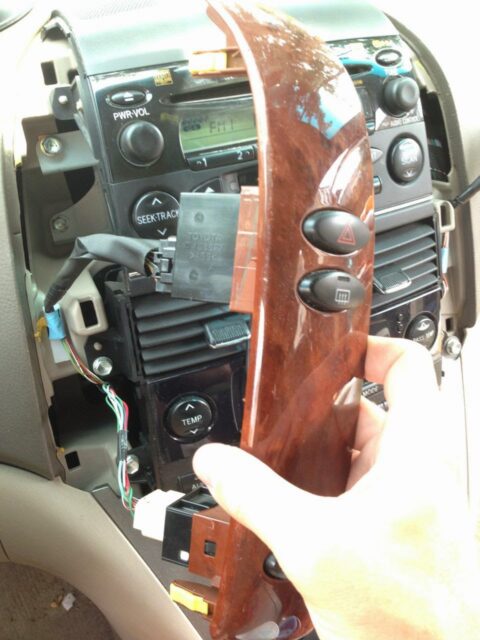
Step 6: Disconnect the wiring from the stereo.
Gradually pull the stereo straight out. There are five connectors, the left three have a tab you must press in, to release them and the two black ones pull straight out.
 |
| The 5 connector locations on the back of a Toyota Sienna Stereo Model A56828 |
And the connector tab locations are marked with arrows below:
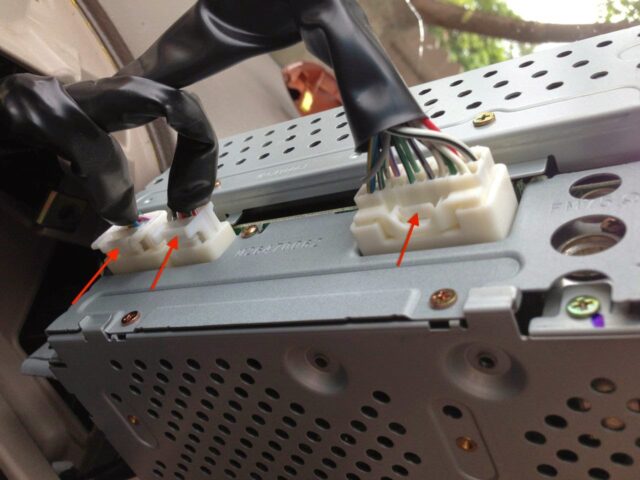 |
| Stereo wiring connector release tab locations |
 |
| Dash with stereo removed |
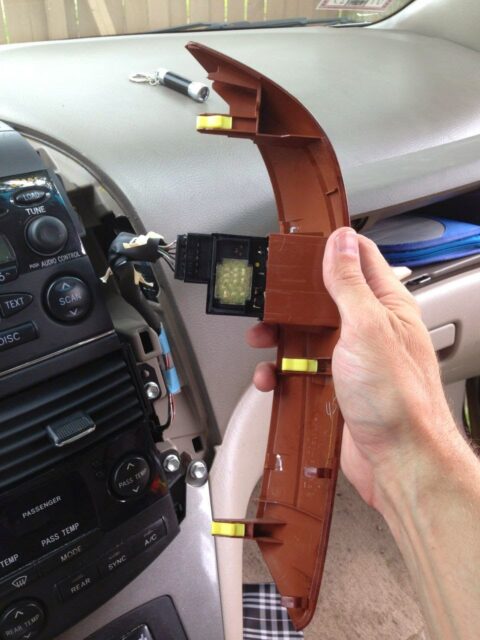
Step 6: If necessary, transfer the bracket from each side of the old stereo to the replacement.
If your replacement stereo did not come with mounting brackets then you will need to remove the ones from the old one and place them on the new. There are 4 10-mm headed hex screws on each of the two brackets. My replacement stereo came with the bracket on it so I didn’t need to do this.
 |
| Remove the left and right radio mounting brackets to install on the new stereo, if necessary |
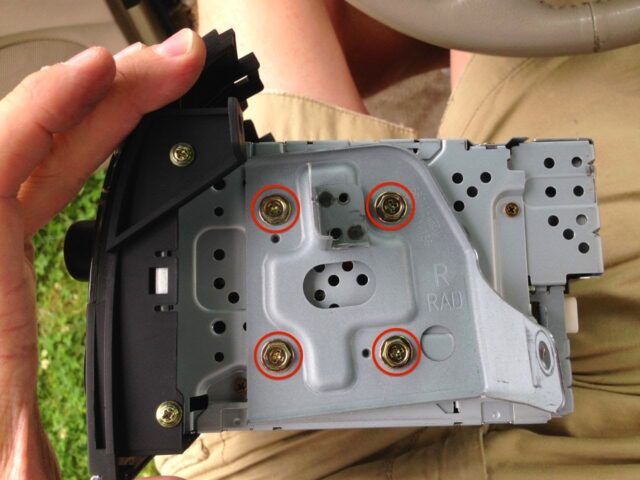 |
| Bracket bolt locations |
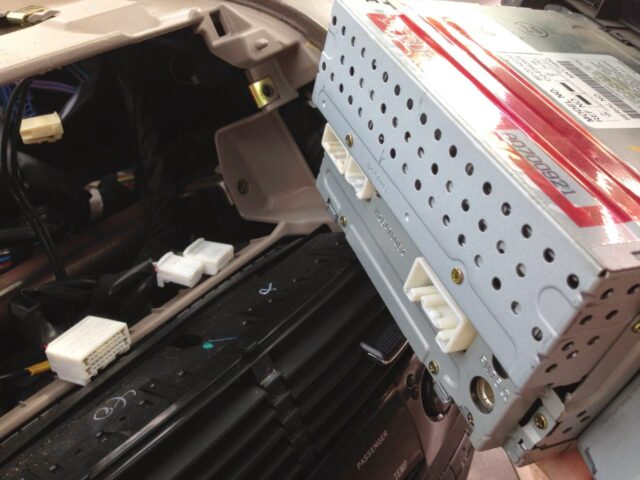
Step 7: Connect the wiring to the replacement stereo.
Make sure each of the three yellow connectors “snap” into place. You can’t mix up the connectors because they are each a different size.
 |
| Re-connecting the new stereo |
I discovered that the part on the stereo side of one connectors had been broken off when they picked this used part so one wouldn’t snap in.
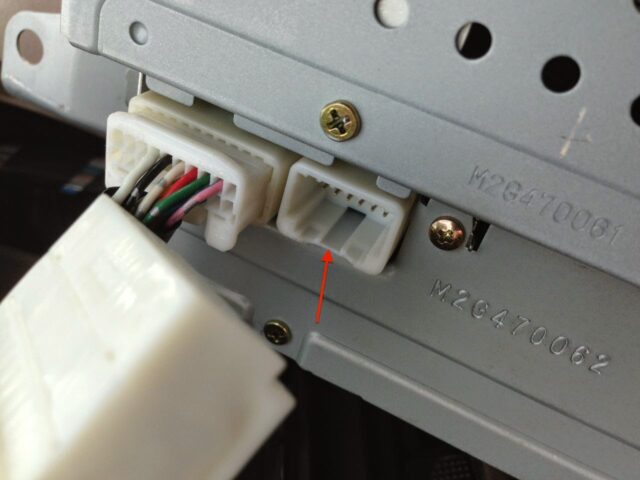 |
| The used stereo I got off ebay had a broken connector |
I put some electrical tape around both connectors to try to support the connector with a broken “catch.”
 |
| The new stereo re-connected |
Step 8: Gently place the stereo into the opening of the dash and test it out before you go any farther.
It is a good idea at this point to test that everything works on the stereo. I would test it by:
- Loading all 6 CD’s
- Play a tape (or cassette adapter for your iPhone like in our case)
- Check the FM and AM radios
- Play a DVD on the back DVD player and verify you can hear the sound
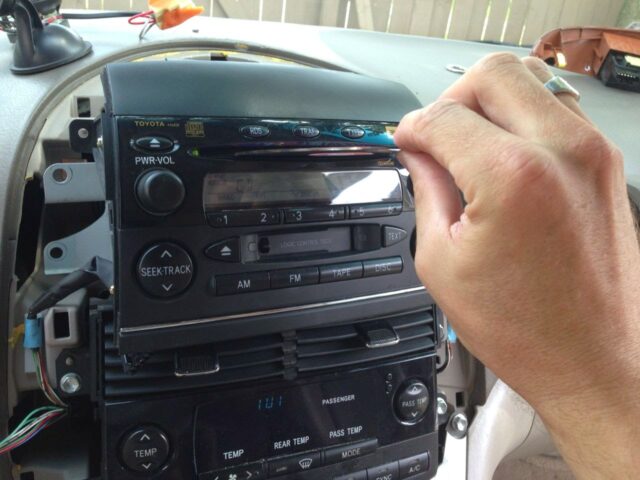 |
| Testing the replacement stereo by inserting all 6 CD’s |
Step 9: Re-seat the stereo in the dash and reinstall the 4 bolts.
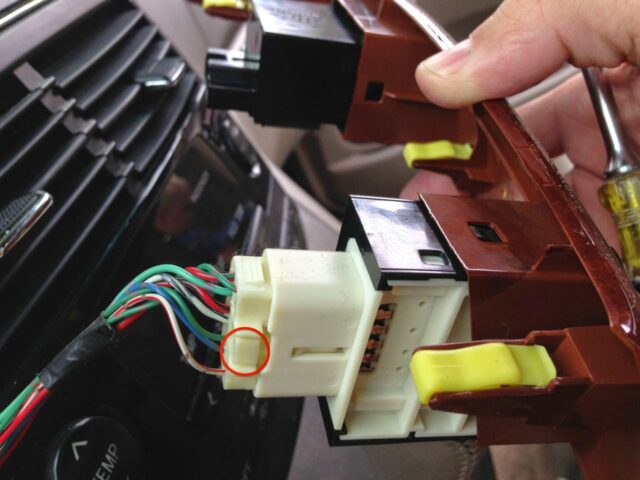
As you are putting the stereo all the way back in place be aware of the antenna cables and wiring harnesses to make sure they have room. Also be looking for the center channel speaker wiring connector. There are two posts that stick out of the dash that the stereo sits down onto to guide in place. Make sure the stereo mounting brackets are set down onto them:
 |
| Make sure the bracket sits down over the post circled above |
Step 9: Reconnect the center speaker and reinstall the 2 bolts.
One thing to note is that there are two tabs on the speaker that fit down into a notch in the dash so be aware that they must line up:
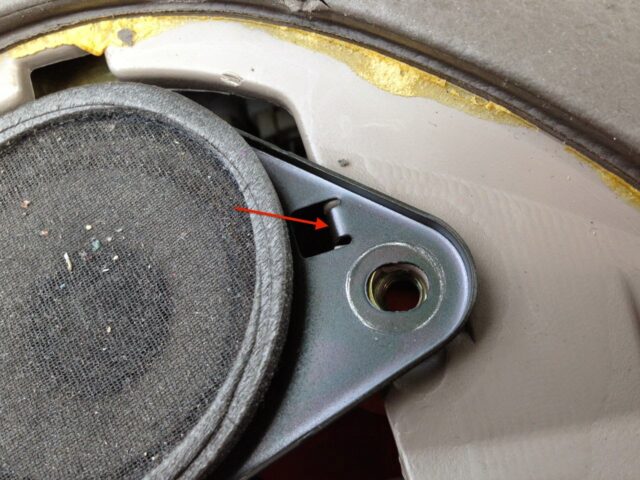 |
| Tab on the speaker that fits down into a notch |
Step 10: Reinstall top center channel speaker grill panel.
Insert the near side with the tabs down into their slots and then press the back side down.
 |
| Reinstalling the top panel–start by inserting the front tabs first |
Step 11: Reinstall the left and right side panels.
On the left side there are two electrical connectors that must be connected first. Make sure they latch into place. On the right there is only one.
 |
| Reinstalling the left panel |
 |
| Reinstalling the right panel |
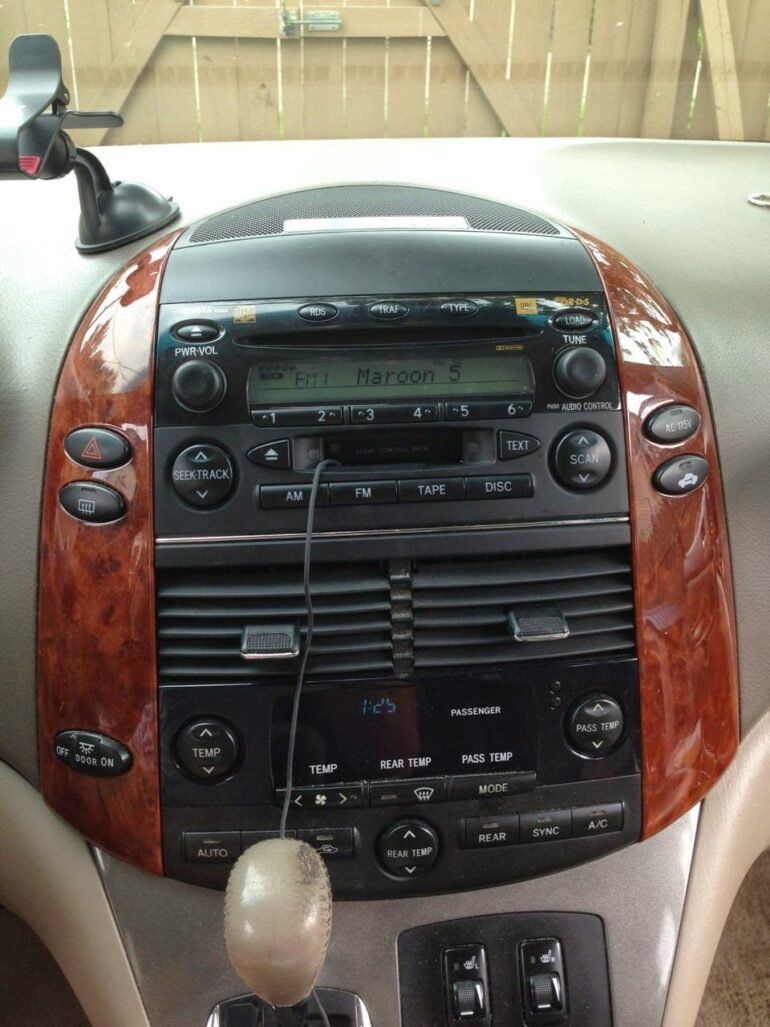
Success:
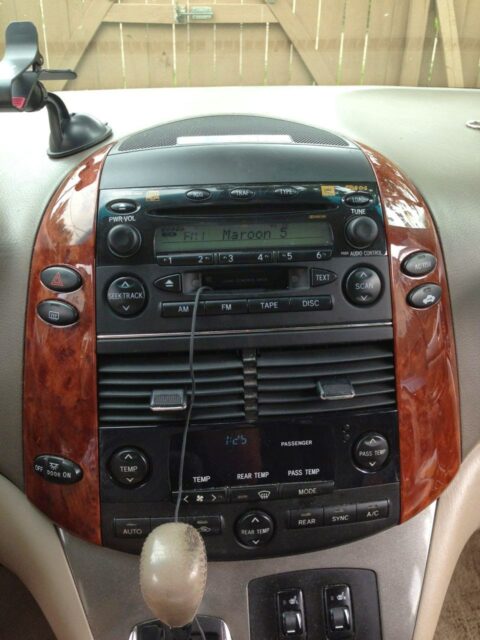 |
| Successful installation of replacement Toyota Sienna Stereo Model A56828 |
All My Toyota Sienna Posts:
Amazon Associate Disclosure: As an Amazon Associate I earn from qualifying purchases. This means if you click on an affiliate link and purchase the item, I will receive an affiliate commission. The price of the item is the same whether it is an affiliate link or not. Regardless, I only recommend products or services I believe will add value to Share Your Repair readers. By using the affiliate links, you are helping support Share Your Repair, and I genuinely appreciate your support.
Related
with 5-disc CD changer and Cassette Model No 86120-AE030, Ref No CQ-ES8260X
(if you don’t want to use a screw driver to pry up the panels)
(if you don’t want to buy the body panel pry tools)
Hi John! About to tackle the power door cable repair (it just happened on our 2008). Thanks for the write up! I see that you have heated seats on your van as well. Ours have never worked (got the van 2 years ago) I have checked all the fuses and my mechanic can’t tell what the deal is. Have you had any issues with yours? I can’t find anything on possible causes and I refuse to go to the dealership. Killer opportunity if you can do a premium write up. Thanks!
-Mike