Horn Won’t Work-How to Troubleshoot The Horn on a 2004-2010 Toyota Sienna
Automobile:
Tools Needed:
- Fluke 177 True RMS Digital Multimeter with Backlight
(or any other multimeter that will measure DC voltage)
Parts Needed:
- 10 Amp fuse (if yours is blown, buy a set to cover all your automobile needs: Assorted 120 Car Truck Fuse 5,10,15,20,25,30 AMP
)
I recently replaced the radiator in my 2004 Toyota Sienna, which I wrote up the tutorial on how you can do it too:
How to Replace the Radiator in a 2004-2007 Toyota Sienna
It was after replacing the radiator, which required me to remove the horns, that I ran into the issue of the horn not working. Here’s how I fixed it…
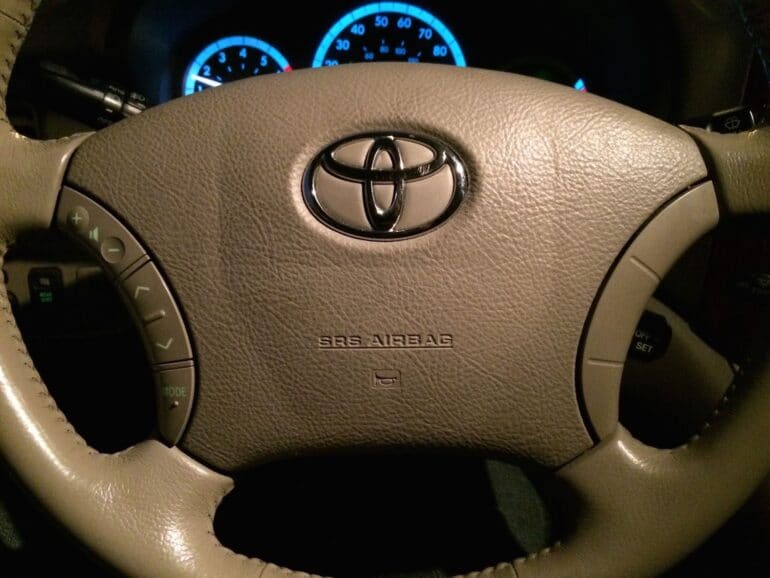
Step 1: Press the horn in the middle of the steering wheel.
If the horn doesn’t blare then you’re in the same boat I was in this morning and read on…
Step 2: Will your horn go off if you press the panic button on your Sienna’s key chain remote?
Press and hold the red button on your remote.
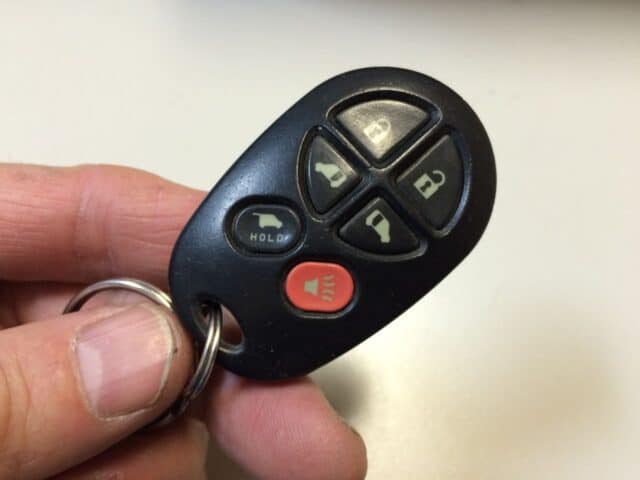 |
| Toyota Sienna Keychain Remote |
When I did this, only one of the horns went off and it didn’t sound like it normally did. There are two horns mounted inside the bumper, as shown in this picture I took when I was replacing my radiator:
 |
| Horns are mounted inside behind the grill/bumper, in front of the radiator/condesor panels |
So, because one horn went off I knew that at least there was electrical conductivity to one of the horns and it wasn’t a fuse (and this was encouraging to me). But, for you it could be a fuse so I’ll go on to step 3 and show you how to check the horn fuse.
Step 3: Has the horn fuse been blown?
Open the hood of your van and look above and to the right of your battery. There is a black box–it is the fuse bank:
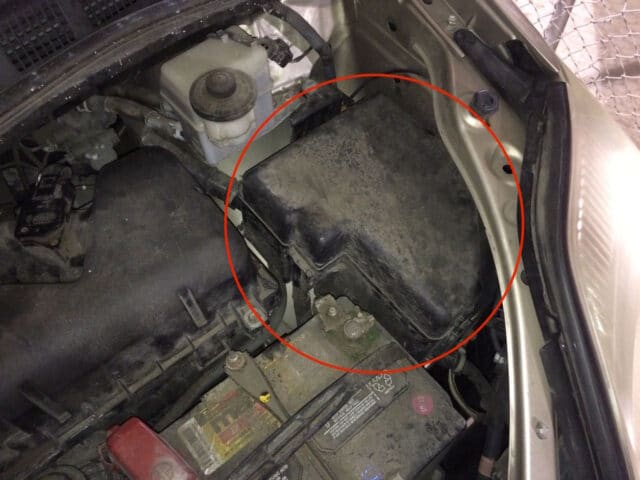 |
| Location of fuse box, by the battery |
On the side closest to you there is a latch that must be pressed in to release the top:
 |
| Fuse box lid latch |
The top of the box is hooked under the far end of the lid so you’ll only want to lift the side closest to you. Once you get the lid off you can see that on the inside of the lid there is a diagram telling you which fuse goes to what electrical component in the van (and nicely there are extra, spare fuses in there too).
 |
| Fuse diagram on inside of the lid of the fuse box |
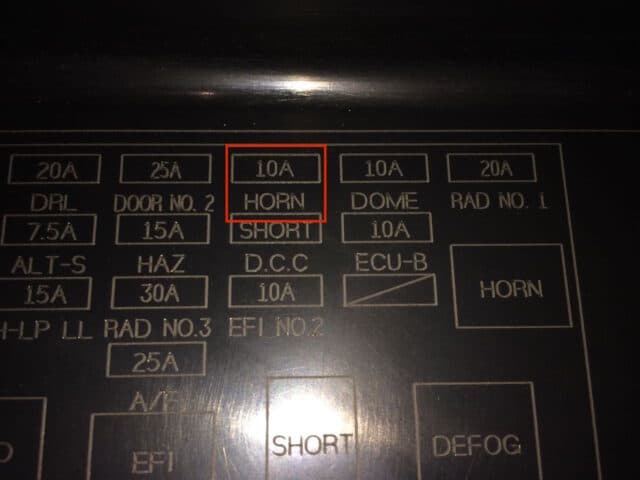
There is a horn relay and a horn fuse. We are more concerned with the 10 Amp horn fuse at this point. You can pull it straight out with a needle nose pliers:
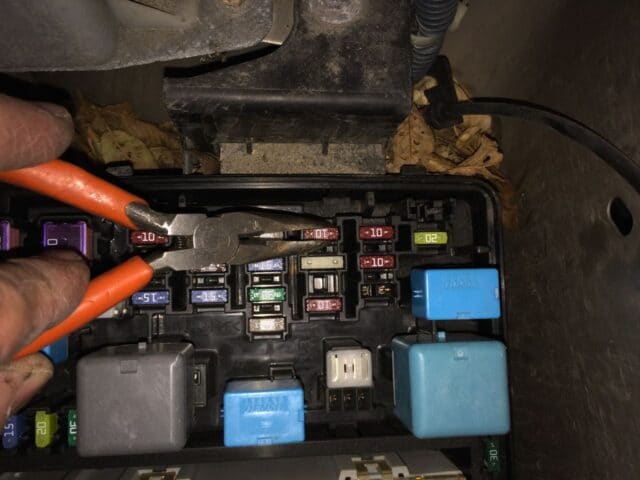 |
| Removing the 10 Amp horn fuse |
This is what a good fuse will look like:
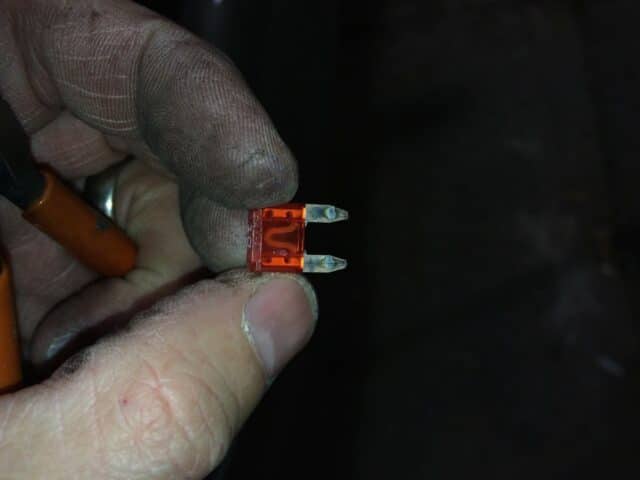 |
| Good Fuse |
The u-shaped wire that runs from one leg of the fuse to the other inside the plastic case would be broken (burnt through) if the fuse was bad. If it has been blown you can grab one of the spares from a 10A spare spot if there is one available or pick up a fuse here.
Step 4: Check for power at the horn.
Although the horns are mounted in front of the radiator inside your bumper, you can still get at them without taking the bumper off and without needing to crawl under the van. You can see the driver’s side horn in this picture:
 |
| Driver’s side horn seen below the horn release lever |
Pop out the centers of the clips on the top edge of the bumper and remove the clips.
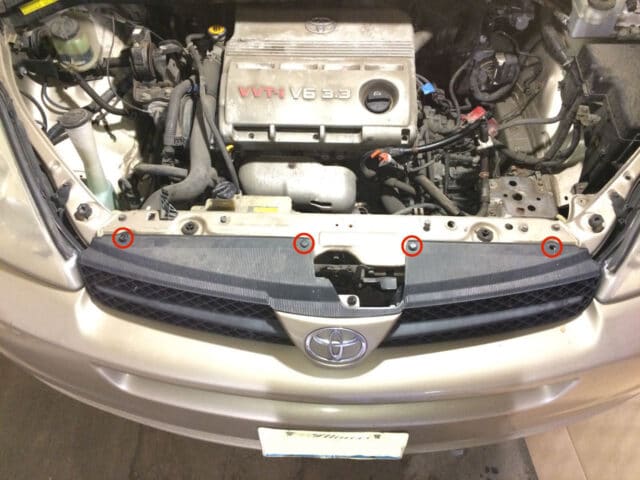 |
| Remove these clips to gain access to the horns without taking off the bumper |
Once you have the clips removed you can life up on the top edge of the grill/bumper assembly and gain access to your horns. It’s a little tight and you must be careful not to bend the grill back too much. I found it very flexible though. I was actually able to disconnect the driver’s side horn connector without even touching the bumper. One handy tool I used was my flexible grabber, which I used to hold the horn wire to keep it from falling down into the bumper:
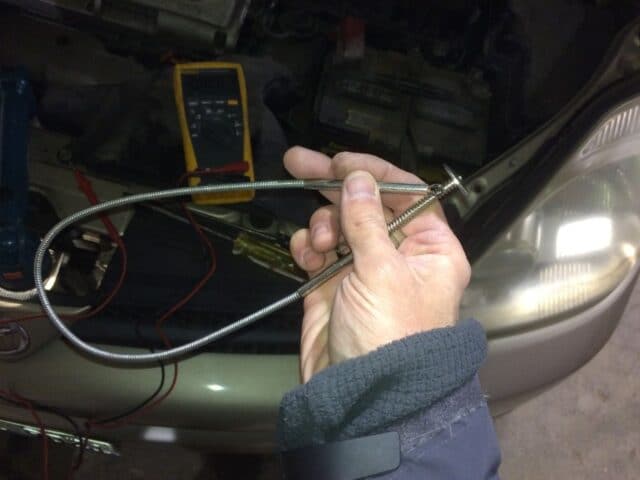 |
| Flexible grabber claw |
Set your multimeter to DC volts (20 Volt Range or so since the readout is going to be between 0 and around 12 volts). Disconnect the horn connector and place the positive lead of your multimeter into the connector. Clip the negative lead onto the metal body of the van (preferably in a non-painted area for the best electrical connection).
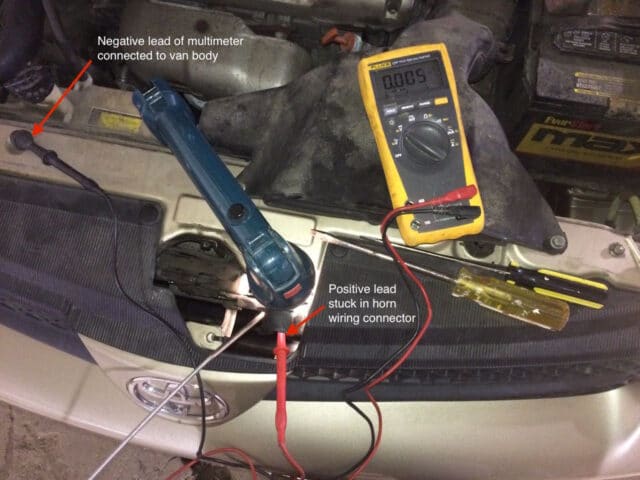 |
| Testing the horn voltage with my multimeter |
Press and hold the horn button (center of steering wheel) and watch the voltage on your multimeter. It should read around 12 volts. Mine read around 12.5. If you get 12 or so volts you know you have a good positive connection to your horn. I shot a little video of me testing it:
Since the horn is getting 12 volts just fine, it’s now time to check the ground. Automobiles use the metal body of the vehicle for the ground wire connection so if there isn’t a good connection to the body then it may not work. I bolted those horns on tightly but there may be corrosion or dirt insulating the horn from the vehicle.
Step 5: Check the ground connection of the horn.
I concluded that the issue was with the horn’s ground connection to the van. I took off each horn. There is one 12mm hex-head bolt holding each on. Here I am removing the driver’s side horn:
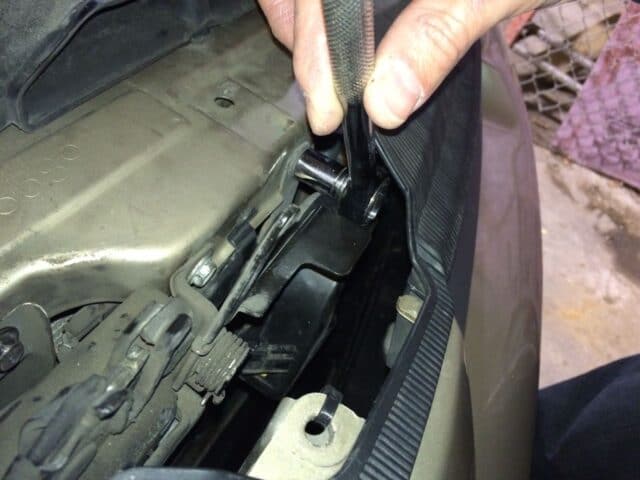 |
| Removing the bolt from the driver’s side horn |
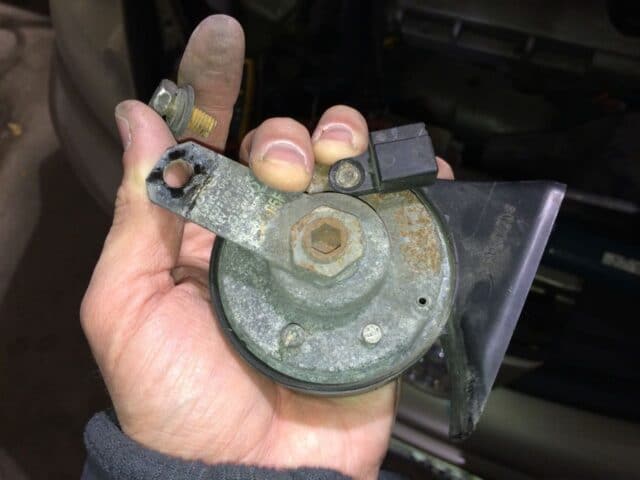 |
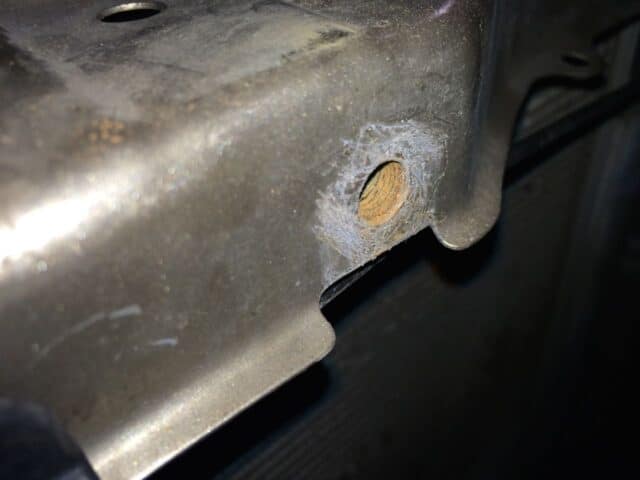
| Driver’s side horn removed–note the dirt on the painted surface around the hole where it was bolted to the van |
I took the horn to the grinder and ground all the paint and corrosion off the tab:
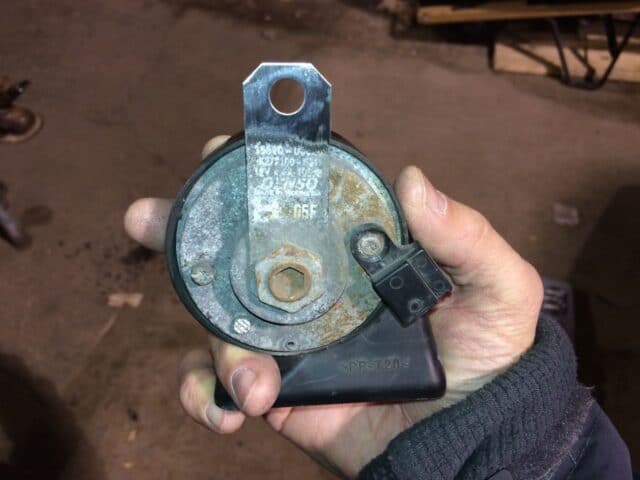 |
| Horn mounting/ground tab ground shiny smooth |
I also scratched up the place where the horn mounts on the van body:
 |
| I roughed up the place where the horn mounts too |
Repeat this on the other horn and reinstall both horns and reconnect their wiring connectors and you should be back in business. Most likely it is a grounding problem if your horn isn’t working (and you recently removed the horn like me).
All My Toyota Sienna Posts:
- How to Change the Air Conditioner Display on a 2004 Toyota Sienna From Metric to English
- How to Replace the Front Struts on a FWD 2004 Toyota Sienna
- How to Change the Air Filter on a 2004 Toyota Sienna
- 2004 Toyota Sienna XLE DVD Entertainment System Does Not Display Video After Turning Vehicle Back On
- How to Fix Sienna Dome Lights Randomly Coming On And Alarm Going Off
- How to Replace the Rear Liftgate Shocks on a 2004 Toyota Sienna
- How to Change the Cabin Air Filter on a 2004 Toyota Sienna
- How to Program the Door Lock Transmitter on a 2003 Toyota Sienna
- How to Replace the Power Sliding Door Cables on a 2004-2007 Toyota Sienna XLE
- How to Prolong the Life of Your Toyota Sienna Sliding Door Cables
- How to Replace the Stereo on a 2004-2010 Toyota Sienna
- How to Fix The Spring on the Cassette Door on a 2004-2010 Toyota Sienna Stereo
- How to Program a Keyless Entry Remote for a 2004-2010 Toyota Sienna
- How to set the Time/Clock on a 2004-2010 Toyota Sienna
- Horn Won’t Work-How to Troubleshoot The Horn on a 2004-2007 Toyota Sienna
- How to Remove the Front Bumper on a 2004-2007 Toyota Sienna
- How to Replace the Starter on a 2004-2007 Toyota Sienna
- How to Replace the Thermostat on a 2004-2007 Toyota Sienna
- How to Replace the Radiator on a 2004-2007 Toyota Sienna
Other Resources:
Amazon Associate Disclosure: As an Amazon Associate I earn from qualifying purchases. This means if you click on an affiliate link and purchase the item, I will receive an affiliate commission. The price of the item is the same whether it is an affiliate link or not. Regardless, I only recommend products or services I believe will add value to Share Your Repair readers. By using the affiliate links, you are helping support Share Your Repair, and I genuinely appreciate your support.
I pried all around the volume control and channel control on that plastic case as I new it was under there. Then I accidentally bumped the bottom of it and it slide right off. It’s a wonder I didn’t break anything. Still having problems with the horn not working. Am I to check the contact bar on the back of the airbag? Makes no sense why I can push or pull on the steering wheel and the horn will work.
It doesn’t open up.
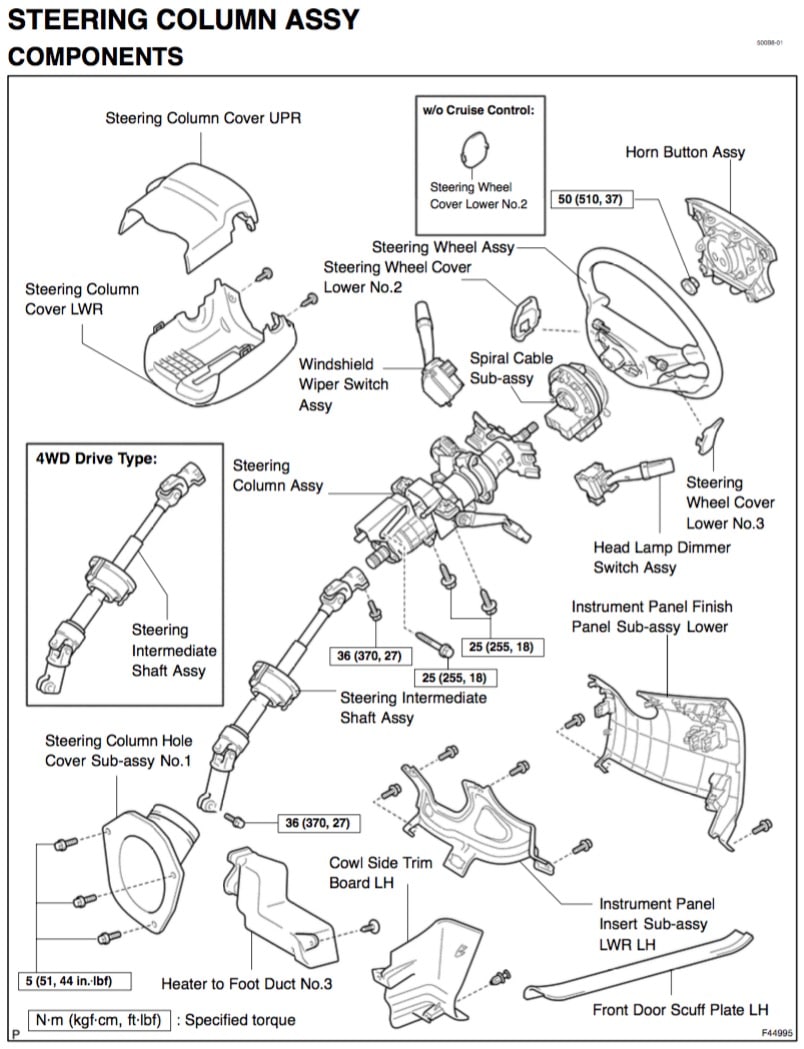
I think I’m going to need more details in order to be able to help you. From the diagram I uploaded I believe there is an Allen-head screw (covered up by a plastic “Steering Wheel Cover” which must be removed to access the screw) on each side of the Steering Wheel Assy (as labeled in the diagram). IF you remove those screws, will the Horn Button Assy come off? The center horn Button Assy may snap into place. If this doesn’t work you may try a dealer and ask to talk to maintenance and if you get a knowledgeable person, they may help you out.
I’ve seen some other blogs and they say it is the round ball bearing underneath the top cover of the steering colum. I packed grease in there as those bearings are what grounds the horn. Mine works better but still off and on. However if I push or pull on the steering wheel then it works as it puts pressure on those grounding bearings. I’ve tried to take off the airbag/horn but I can only locate one screw and can’t remove the volume/channel control on the lower left side. Just really messed up.
John, I have the complete Toyota Repair manual for this van and can look up how to take that steering wheel apart but my laptop is being repaired. When I get it back I’ll come back and see if I can give you any tips on how to get inside there.
John, here’s the diagram of the steering wheel and column:
My 99 toyota sienna horn only works intermitent when I bang on the horn/airbag or keep clicking any of the corners of the airbag. I can also hold it in and it will work from time to time. Doesn’t sound like the clock spring thing. I pulled the plugs of the horns the other day and packed the terminals with grease which keeps the corrosion away and makes a fantastic connection. Guess I’ll check the voltage on the horns tomorrow to see what that is doing. Lots of good information on your video’s and here too. Thanks.
John, if the horn works fine when you click the remote lock button, it sounds like it is the connections that are made inside the steering wheel are the issue for you. I haven’t had any experience with that but I would encourage you to google it and see what comes up. Check back in and share if you figure out how to fix it. Thanks!