If you need to remove the front bumper on your 2004-2010 Toyota Sienna, you are at the only site that tells you step-by-step how to do it ALL without skipping ANY steps. You may be here because you are trying to replace your radiator. I have written up that entire repair, including removing bumper, on the following page:
How to Replace the Radiator on a 2004-2010 Toyota Sienna
How to Remove Front Bumper on 2004-2010 Toyota Sienna
Parts Needed:
- Push-Type Fastener Rivet Retainer Clips
(located on the top edge of the bumper under the hood, because some of them most likely will be broken when you take them out)
- Toyota Sienna Bumper (search on ebay for a good used one)
- Front Wheel Well Clip Center Pins
(if you break some of them)
- Front Fender & Bumper Cover Clips
(I didn’t need to replace any of these but just in case you broke one)
Tools Needed:
- Socket ratchet with the following sockets: 10mm, 8mm
- Vehicle Ramps
- Corded work light
- A large sheet of cardboard–it’s much more comfortable to lay down on cardboard than a concrete floor (and warmer too!).
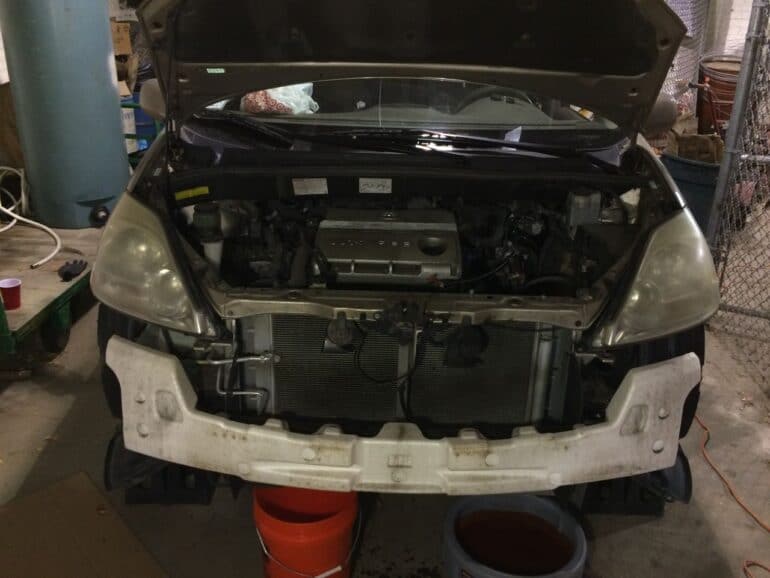
Step 1: Drive your van up on ramps.
I purchased these ramps, which are a pretty good deal and they stack up for easy storage. You could probably do this repair without ramps but it would be pretty tight crawling under your van without that extra space. One thing to note: don’t turn your wheels at all when you are driving up on them because the ramps will turn with your wheels!
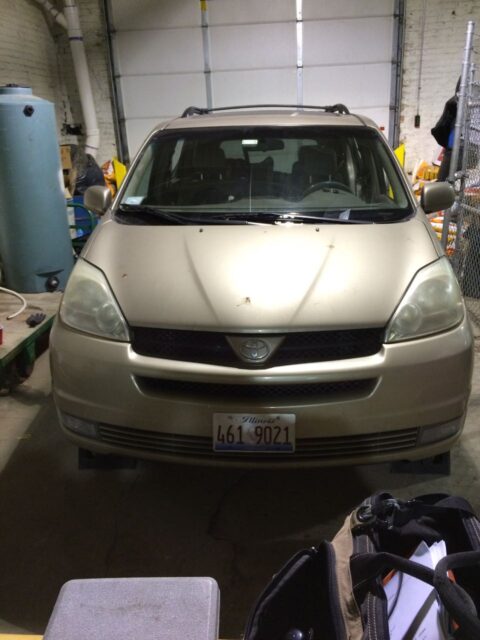 |
| Toyota Sienna up on ramps |
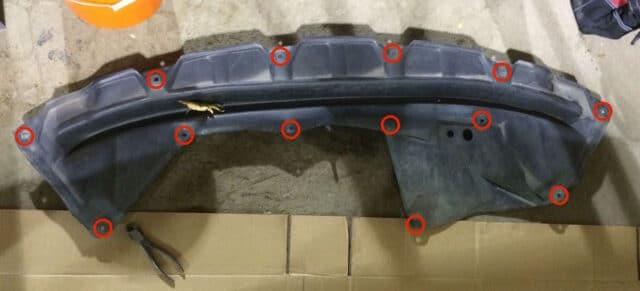
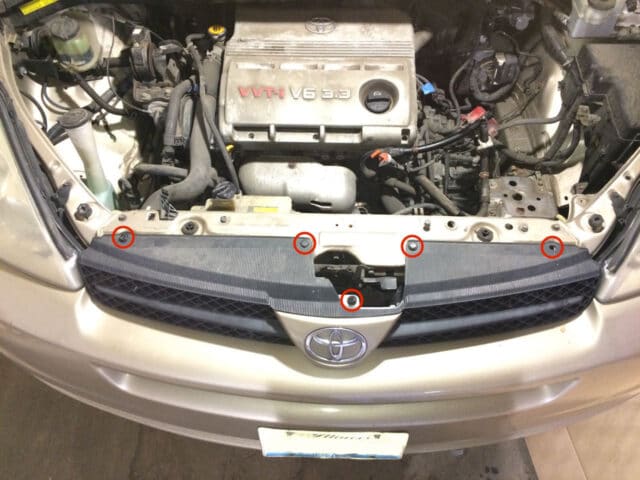
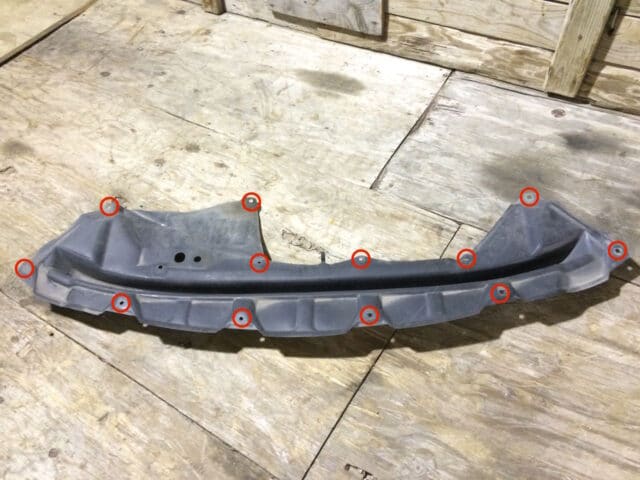
Step 2: Remove the black plastic panel that is under the bumper.
I start with this step so you can start draining your coolant while you are taking off the bumper. This panel is what protects the engine from rocks bouncing up and hitting it. I cannot even find this piece in the repair manual but this is what it looks like and most of the screw locations:
 |
| Screw locations of the black plastic panel under the engine |
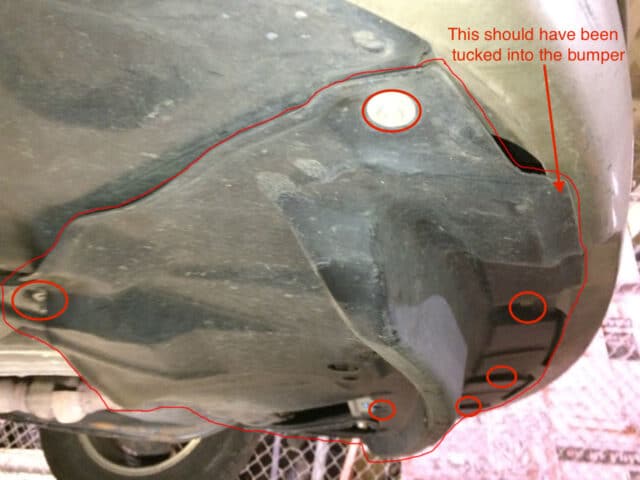
There are around 12 possible locations for 10mm headed screws you will need to remove to take off this panel. On my van some of the screws were missing on it, the front edge wasn’t tucked under the bumper like it should have been, and I even had some zip ties holding it in place at one spot. So you’ll just have to look around. This is what it will look like when you get it off and the places there may be screws attaching it to your van (looking at it from the top side):
 |
| Lower plastic panel screw locations |
Part explosion diagram of the bumper:
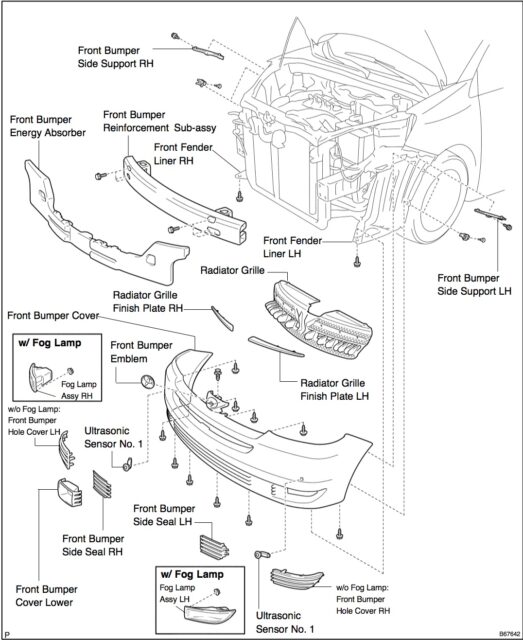 |
| Bumper details |
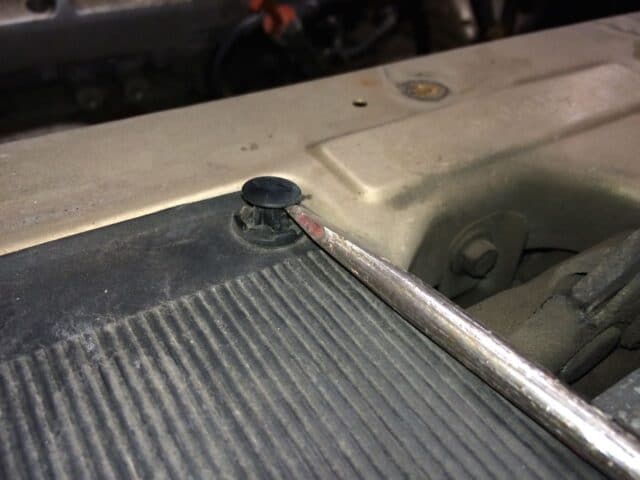
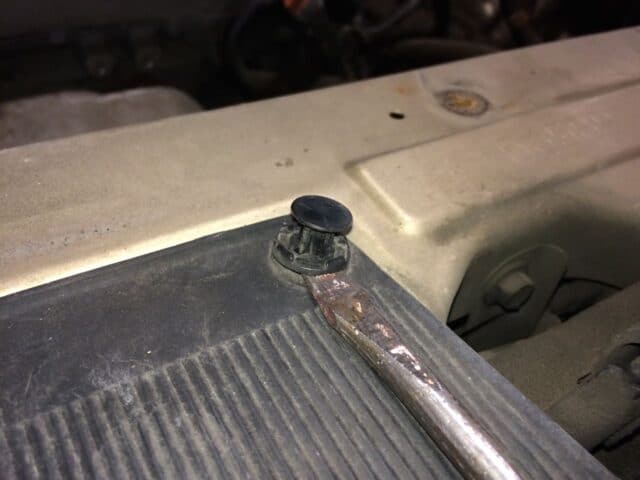
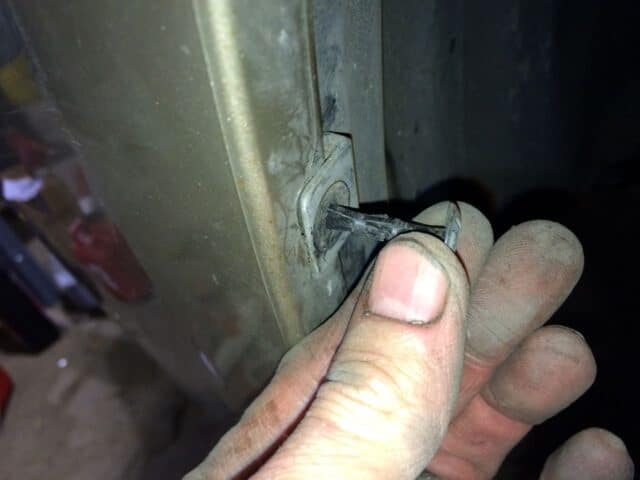
Step 3: Pop the centers out of the two clips on the front end of the wheel well of both bumpers.
One of my readers commented that you should insert a flat-head screwdriver into the center and turn it so it is parallel with the clip (or with the edge of the wheel well) and then pry them out. They may come out easier if you do that but I have not tried it myself. I read all the comments on this site and appreciate everyone’s feedback.
Take the centers out completely and set them in a secure place. Someone requested a link to buy more of these and you can buy them here. At first I didn’t take them all the way out (when I took the picture below) but I had to later. Be careful, they seem to be fragile although none of them were broken when I took them apart (unlike the ones in the front middle of the bumper on top).
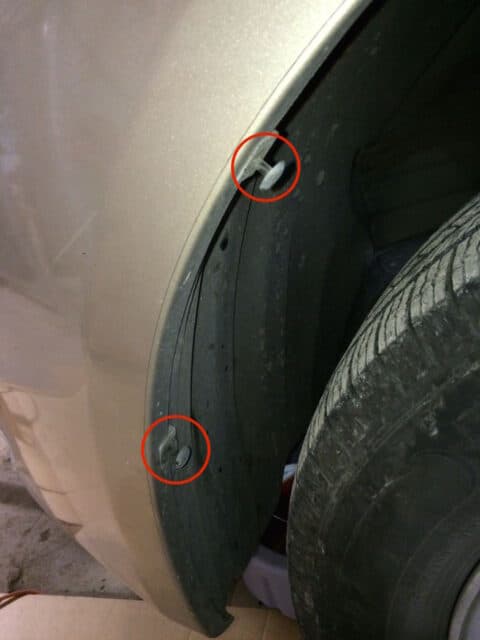 |
| Pry up and remove the centers of the two clips on the front edge of the wheel well |
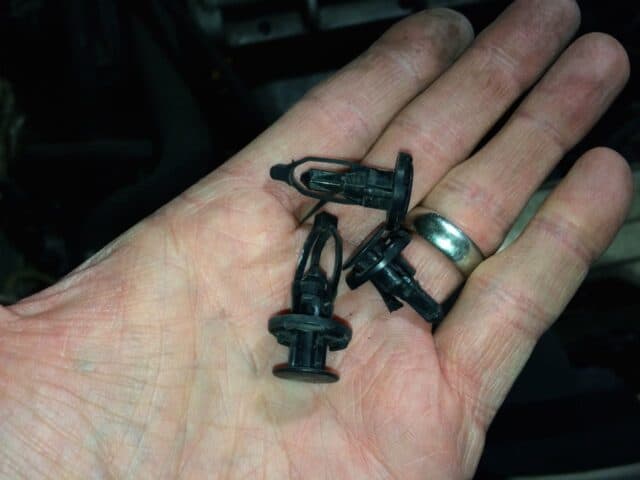
Here’s what they look like removed:
 |
| Center removed from wheel well bumper clip |
Step 11b: Remove the 5 clips from the top front of the grill.
 |
| Front bumper grill area clip location |
Pry the center up (but not necessarily out) first:
 |
| Prying the bumper clip center up |
After you have popped out the center pry up the outside to remove the clip:
 |
| Prying out the unlocked clip |
This is what they look like when you get them out:
 |
| Add caption |
Two of them were shattered when I got them out so I had to replace them.
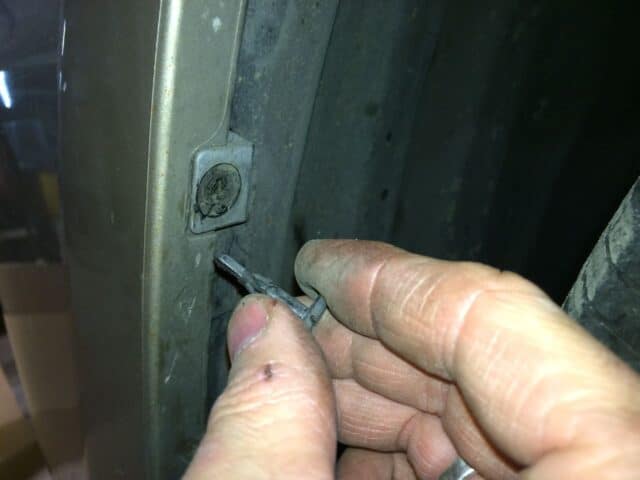
Step 4: Remove the screw from the far ends of the lower edge of the bumper.
This is a phillips head screw (and I believe 10mm hex too) and is right in front of each tire:
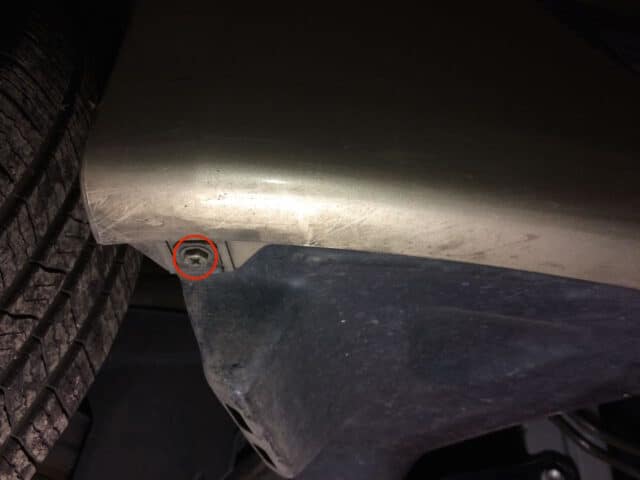 |
| Lower corner bumper screw |
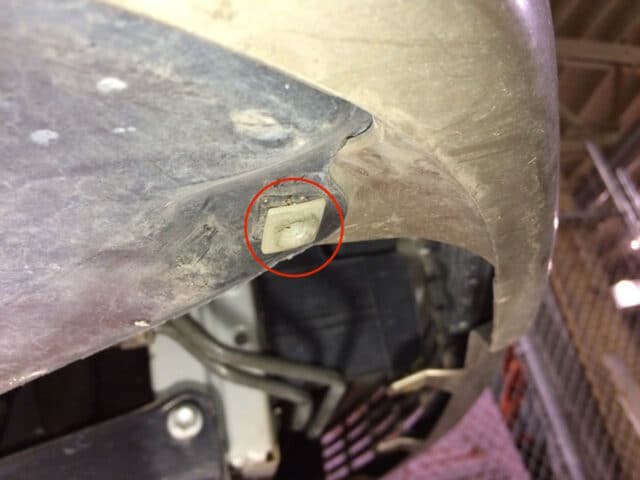
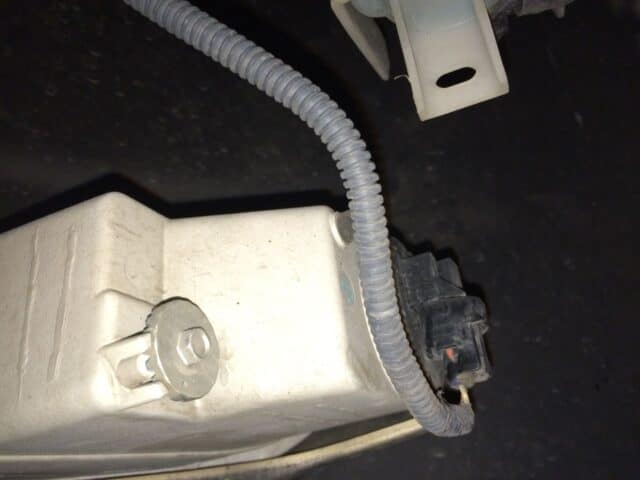
Step 5: Remove the two white square plastic snap-in plugs from the lower left and right corners of the bumper.
This is what they look like:
 |
| White square plastic snap-in plug |
This is what they look like when you get them out:
 |
| White square plastic plugs removed |
Step 6: Remove the bumper from the clip you removed the screw from in step (c).
Some of these were a little tricky for me because some of these clips have a little tab you must lift up from the back side in order to get the clip to release the bumper (even though you removed the screw or popped the center out of the clip. If necessary reach around to the back and lift the tab on the clip and then pull the bumper free.
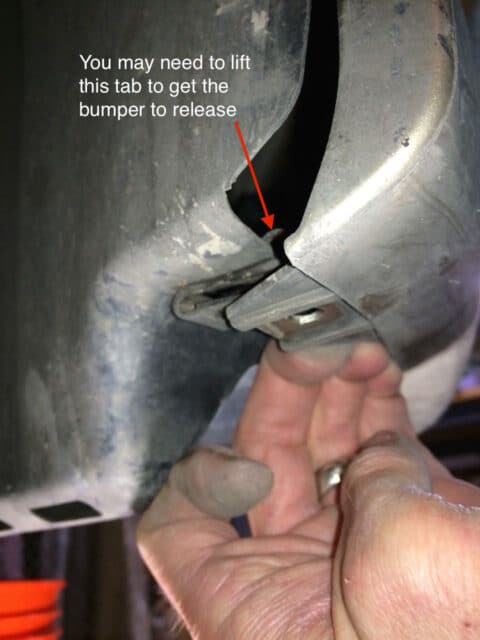 |
| Releasing the lower corners of the bumper |
Here’s a close up of the bracket with the tab on it:
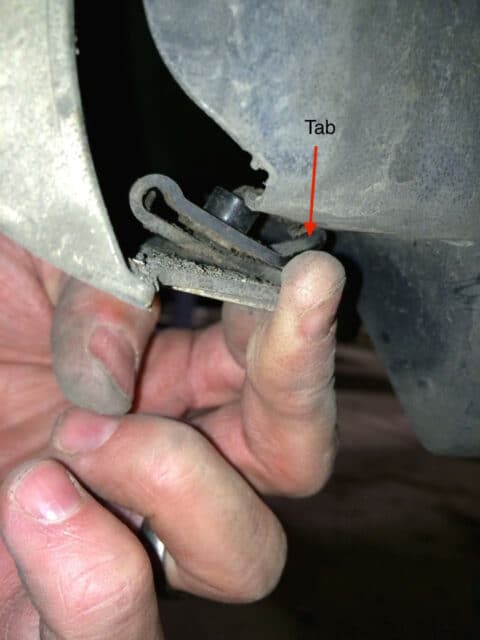 |
| Lower Bumper clip brackets with tab |
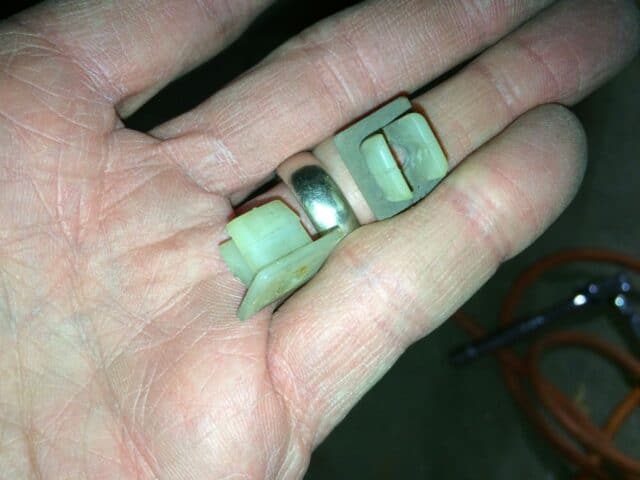
Here’s a look at this clip, removed from the van:
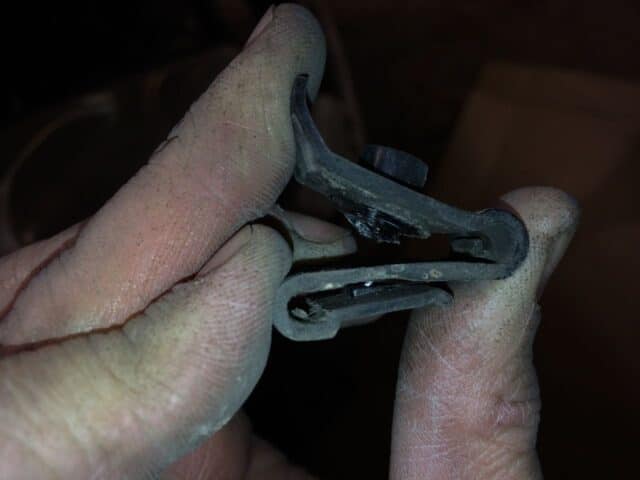 |
| Clip Close-Up |
Step 7a: Disconnect the wiring harnesses from the left and right fog lamps.
You’ll need to look from the underneath side of your bumper for these. Make sure not to pull on the wires but pull on the plastic connector (you can pull the wires out). This is how you remove them:
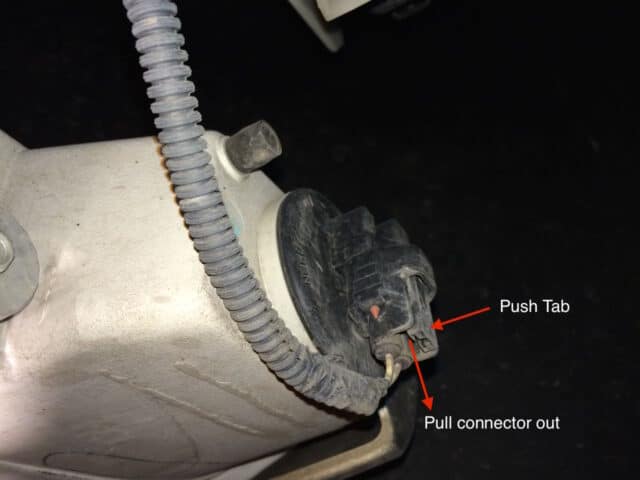 |
| Fog lamp wiring connector removal |
Here’s what they look like removed:
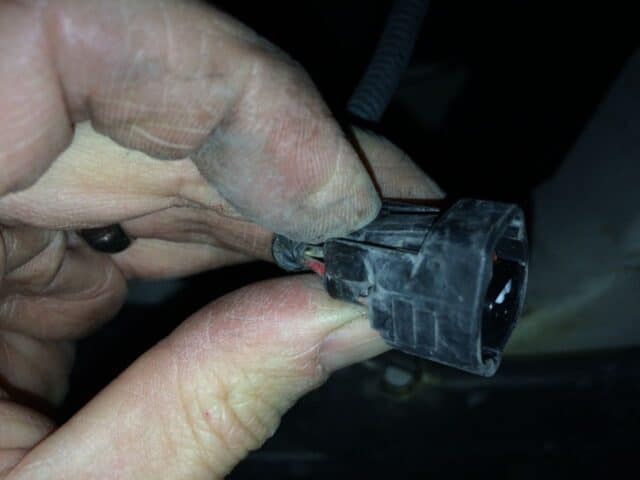 |
| Fog lamp wiring connector removed |
Step 7b: Disconnect any other wiring harnesses you see connected to things on the inside of the bumper.
You may need to disconnect other wiring harnesses at this point too if you have the smart key system or the automatic cruise control that detects that you are approaching another vehicle–there are radar sensors behind the bumper that you’ll need to disconnect at this point as well.
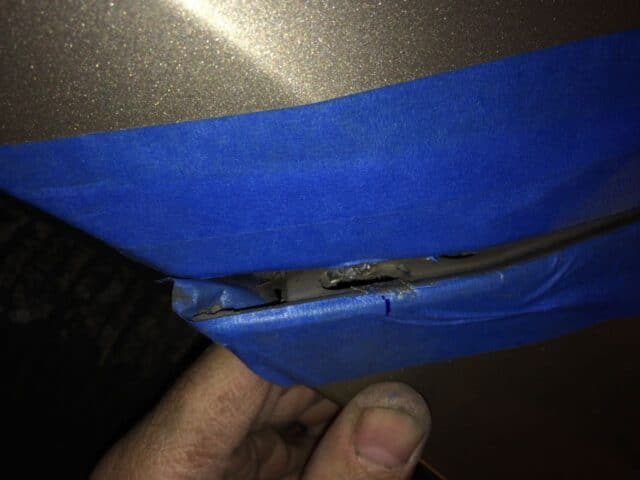
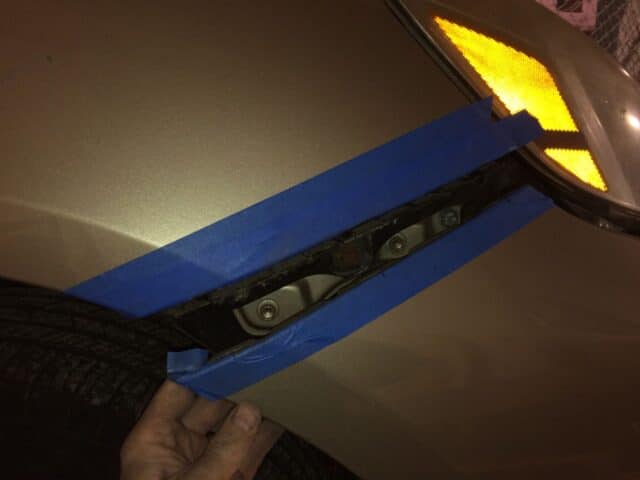
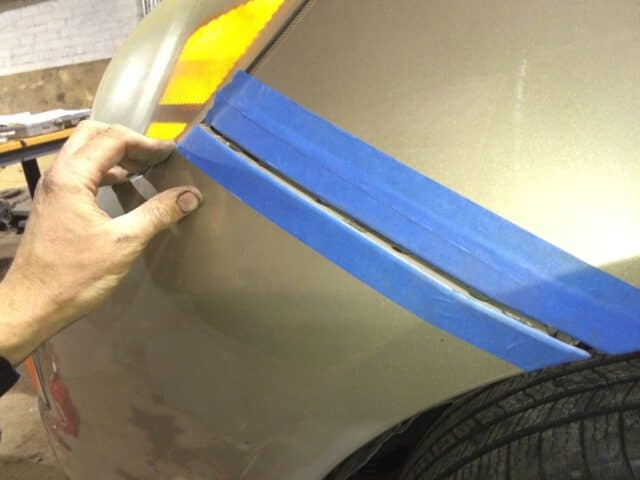
Step 8: Tape the seam of the bumper.
Because we are going to be prying in the seam it is not a bad idea. I used plane masking tape and put down a couple layers and made it wrap around the corner at the seam too:
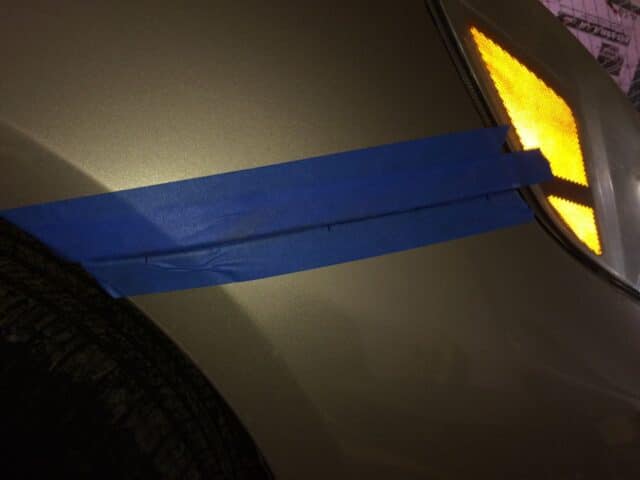 |
| The seam between the bumper and quarter panel taped |
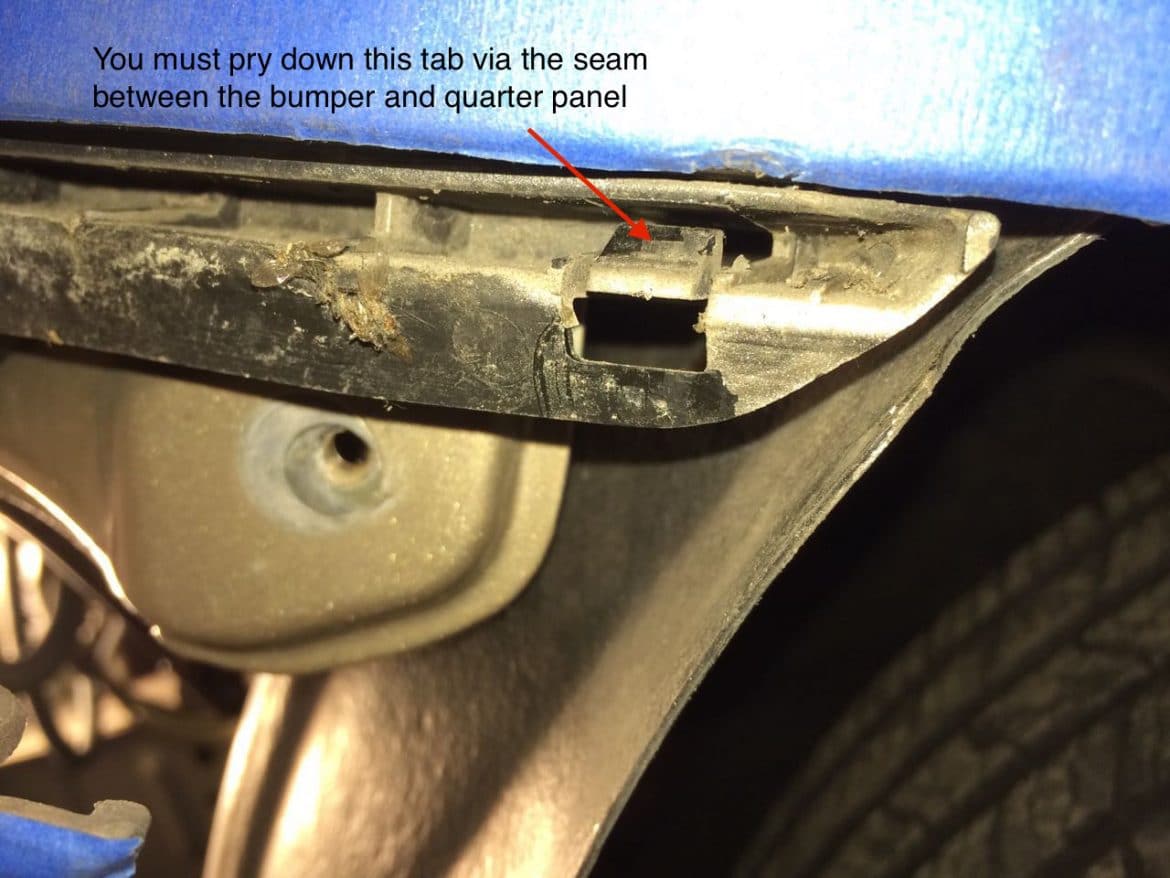
Step 9: Unclip the 3 tabs on each side of the bumper to release it from the quarter panel.
This might have been the hardest step to figure out on this whole repair and I couldn’t find anyone on the entire internet who would tell you how to do it. I didn’t want to break these clips. Here’s a video of me releasing the clips:
 |
| Bumper clip tab |
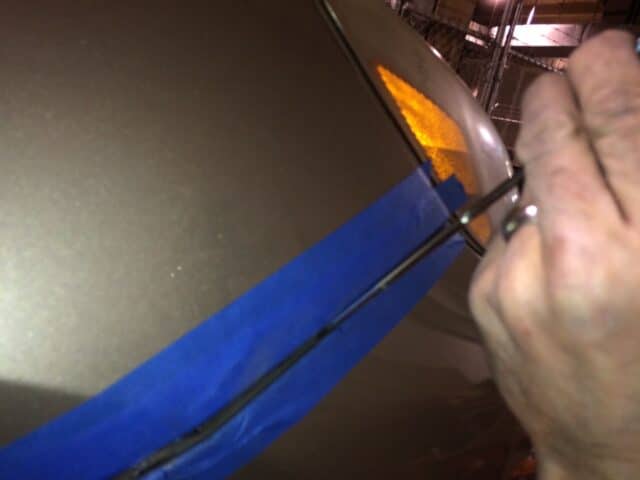
I pulled down on the bumper to slightly, grabbing it from the wheel well edge, to make the seam bigger. Start with the snap that is closest to the wheel and use a thin flat-head screwdriver wrapped with one layer of electrical tape. Locate the “holes” in the bumper, which indicate there is a clip there and insert your screwdriver as seen in the diagram below (as seen looking straight on):
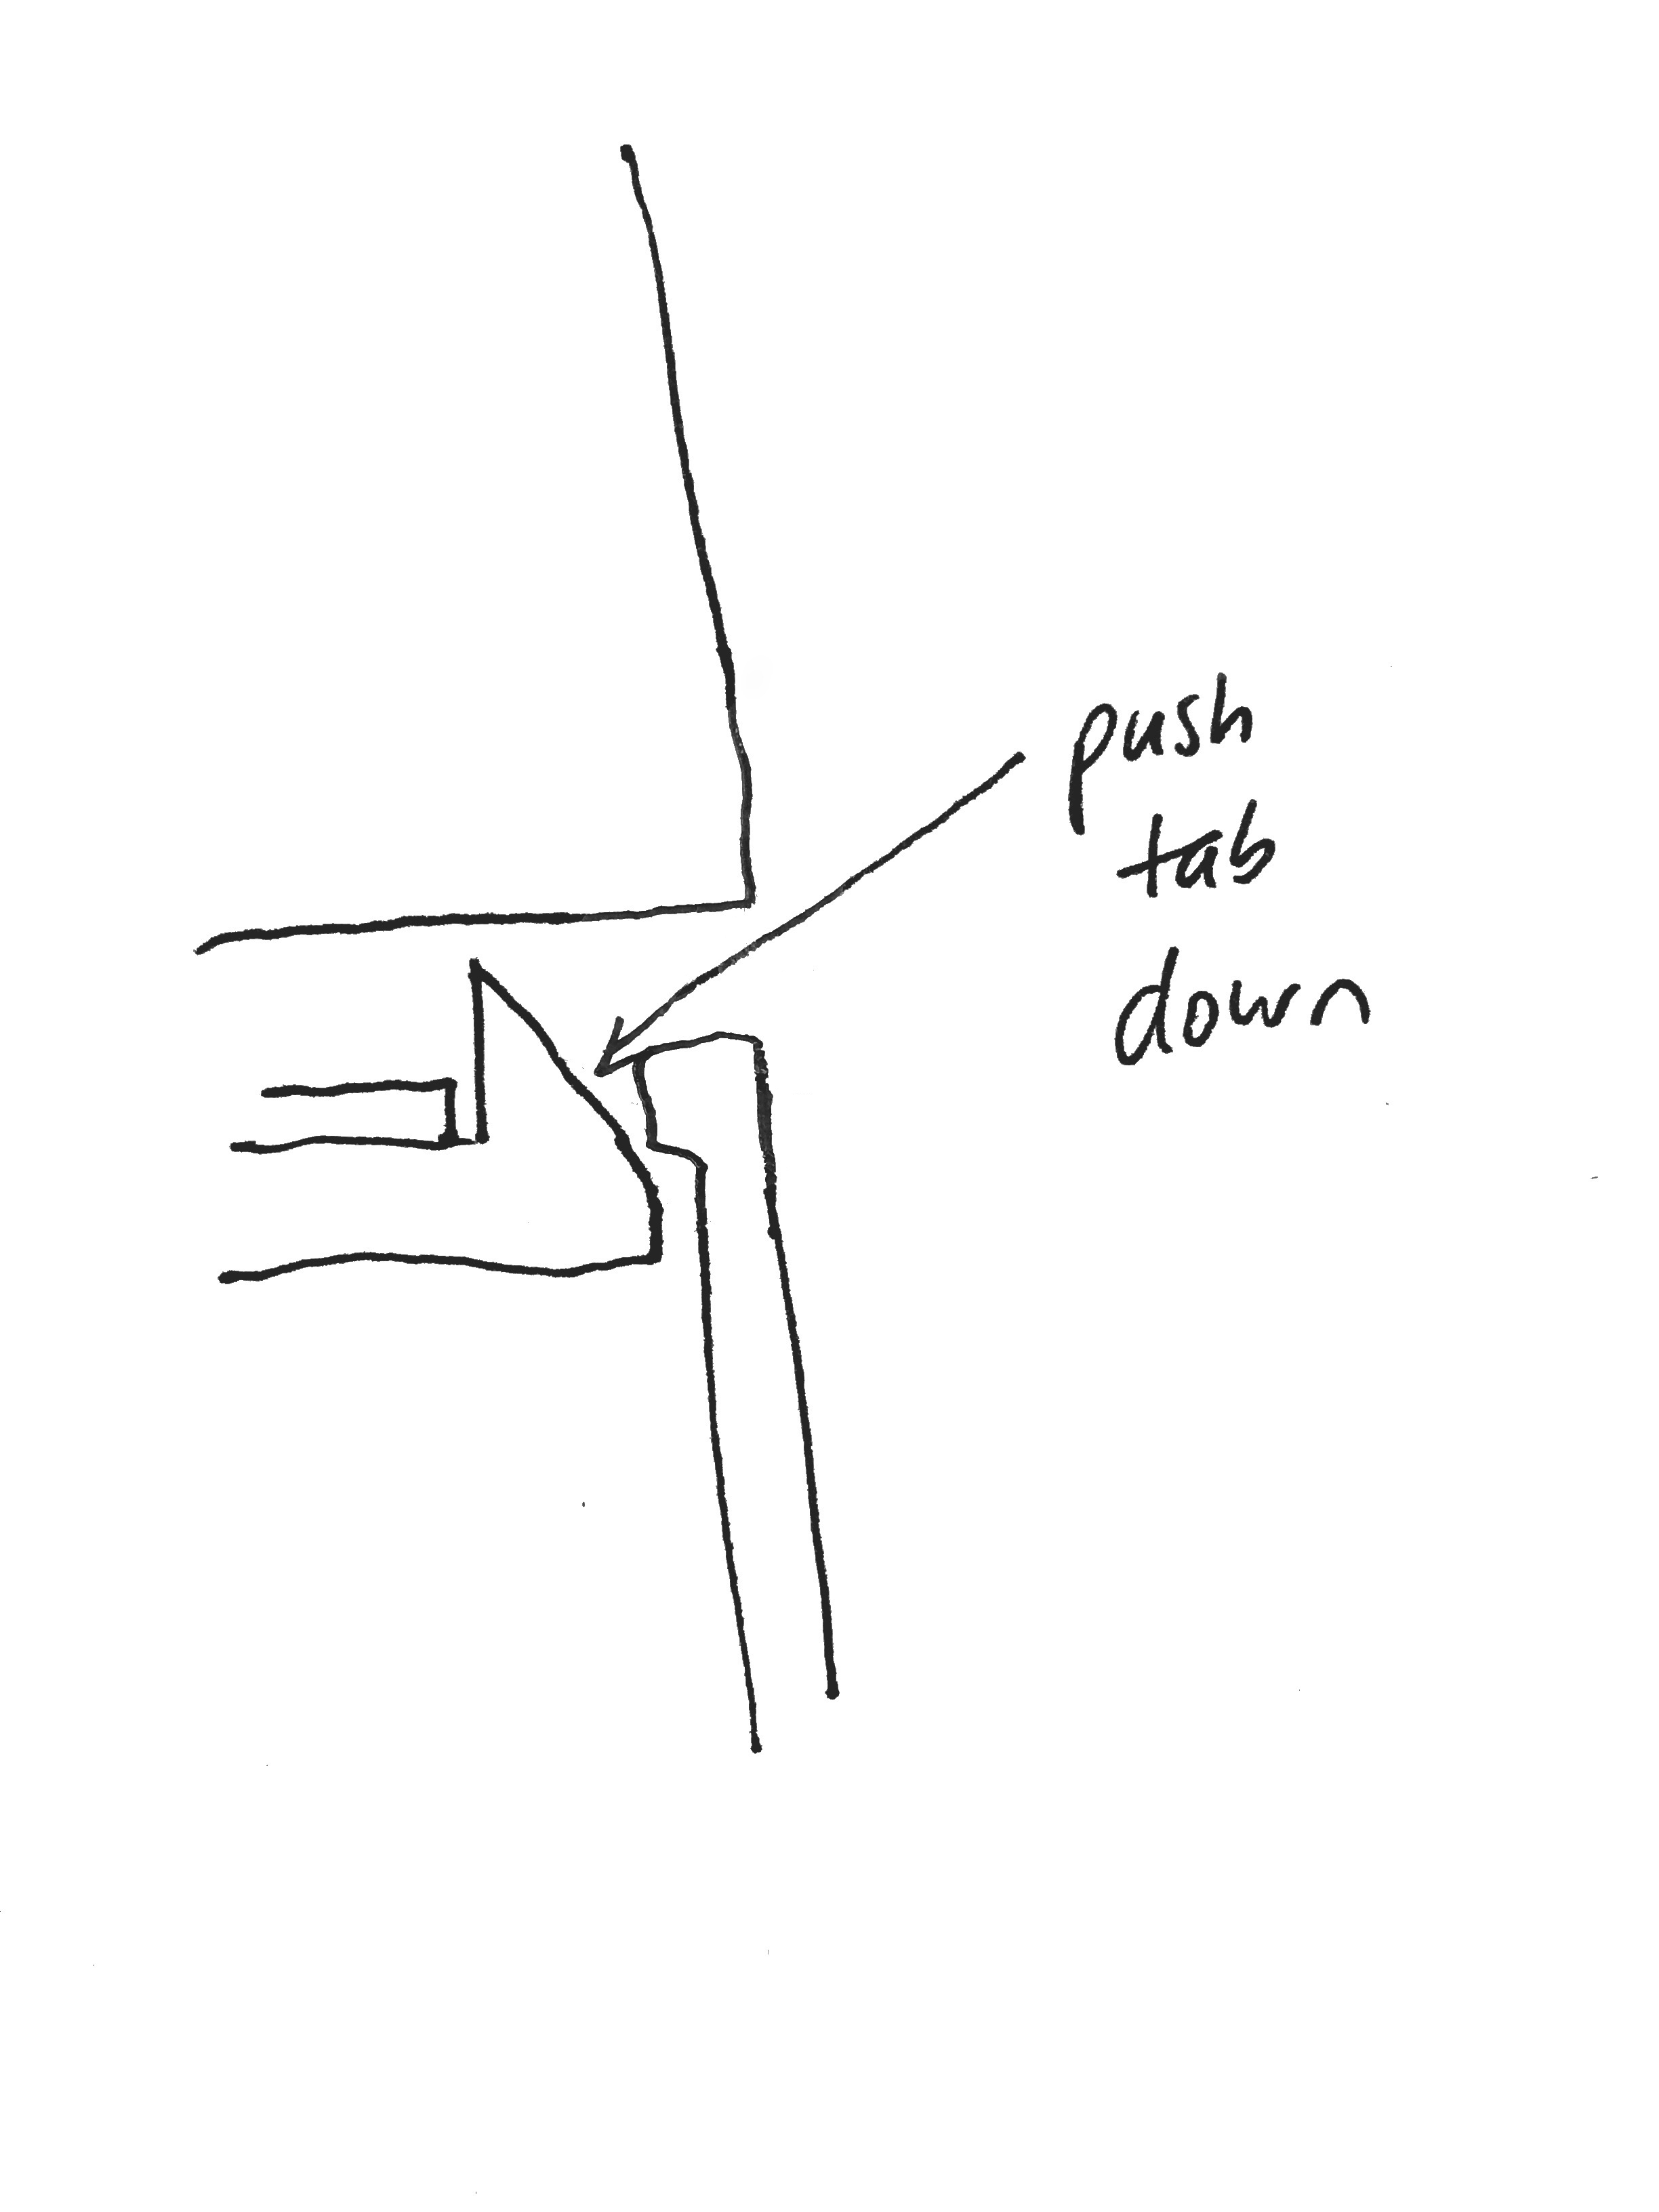
A view if you were looking along the side of the van:
 |
| First clip released |
 |
| Releasing the second clip |
All released:
 |
| The bumper clips have all been released |
In order to help myself find the clips on the second side I measured where they are located from the front edge of the bumper They were located at approximately 1 1/2″, 5 7/8″, and 10 1/2″ from the front edge of the bumper as seen below:
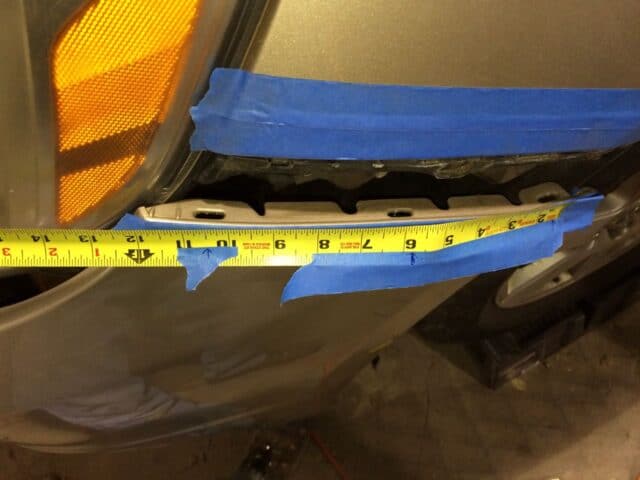 |
| Clip location measurements |
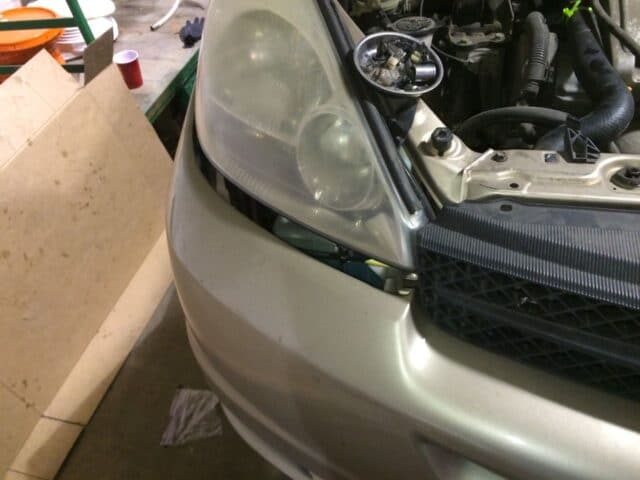
Once you have both sides unsnapped you can remove the bumper. I simply picked it up from the front top, in the middle, and set it aside.
 |
| Bumper Removed |
Step 10: Remove the styrofoam insert.
It is just pushed into a couple holes of the metal frame of the van and comes right out.
Now, how to reinstall the bumper…
Step 11: Reinstall the styrofoam insert.
It just pushes into a couple of holes in the metal bumper:
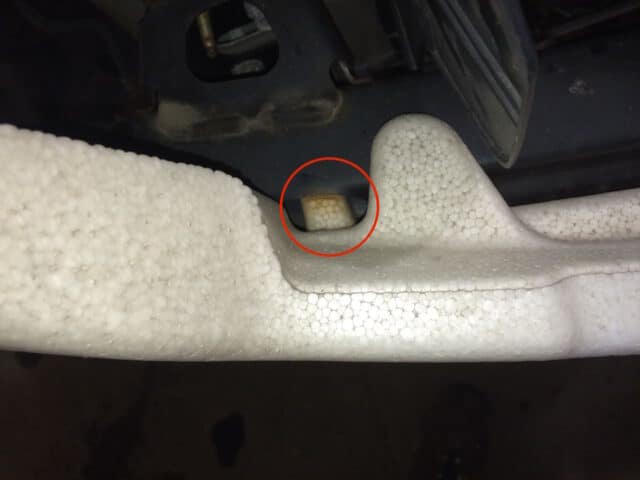 |
| There is one foam finger that inserts into a hole in the metal bumper on each side |
This is the way it is oriented when reinstalled:
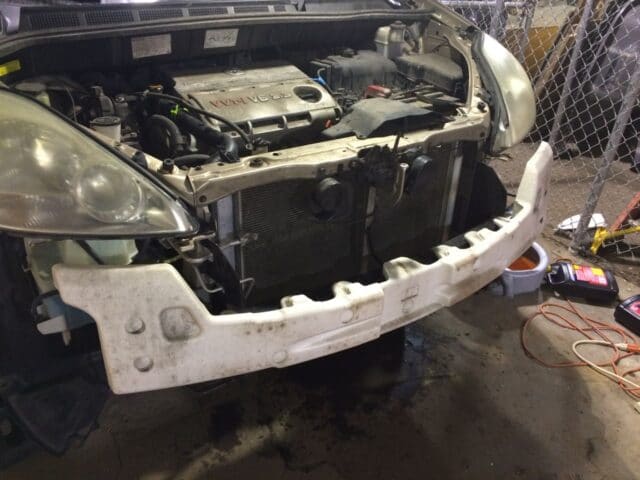 |
| Styrofoam insert reinstalled |
Step 12: Put the bumper assembly in place.
Just set it up where it goes and it will stay by itself pretty well.
 |
| Bumper resting in place |
Step 13: Snap both sides of the bumper back in place.
It is helpful if you feed the fender liners into their clips and it helps line up the bumper when they are in place:
 |
| Feed the fender liner tabs into the clips on the bumper (the bumper ends up on the outside) |
Line it up and press the bumper straight in and it will snap together.
 |
| The bumper is ready to snap into place by pushing the edge of the bumper straight in |
Repeat for the passenger’s side.
Feed the black plastic liner into the clips on the bumper as seen below:
 |
| Feeding the black plastic into the black plastic clips |
Step 14: Reconnect the wiring for both sets of fog lights.
There is one on each side. Make sure the wiring connector “clicks in” so you know it is in all the way and it will not come out on you. I bet you pretty much everyone with a 10-year-old Sienna is driving around with burnt out fog lights. At this step you ought to check your bulbs because now would be the time to swap out those bulbs.
 |
| Fog light wiring reconnected |
Step 15: Reinstall the five clips on the top edge of the bumper by the grill area.
Some of these clips shattered for me so I replaced replaced them.
|
| Front bumper grill area clip location |
Step 16: Reinstall the wheel well liner center snaps.
The first time I put these in I had the wheel well liner incorrectly installed, and not behind the lip of the bumper and inside the clips, as seen below:
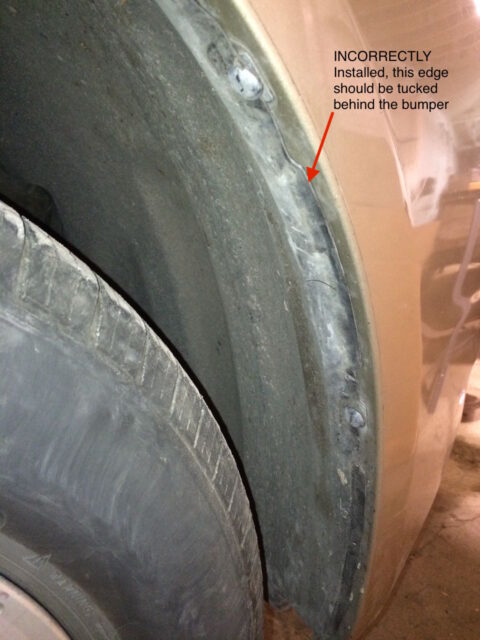 |
| Wheel Well Liner INCORRECTLY installed |
This is what it should look like:
 |
| Wheel Well Liner CORRECTLY installed |
Then reinsert the center pins into the wheel well clips. Line up the slot of the hole with the tabs that stick out on the sides of the pins:
 |
| Re-inserting the the center pins into the wheel well clips |
Reinsert the square plastic snaps into the front underneath corners of the bumper (you will install the screw later when you install the black plastic cover underneath)
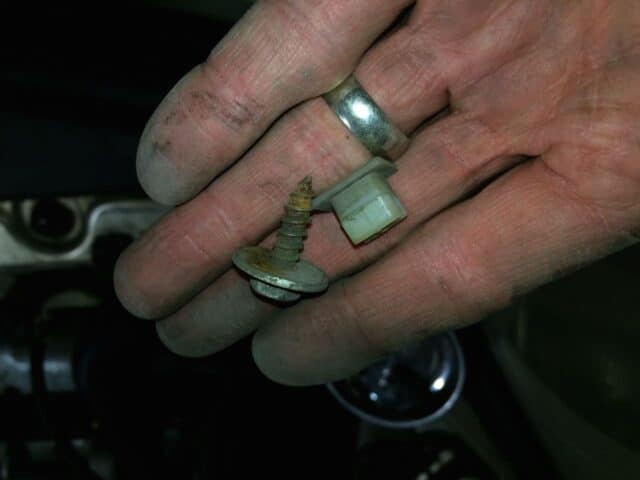 |
| Square plastic snap and the screw that goes in it |
This is the order of the layers–the bumper should be on the outside and the snap should go through both layers:
 |
| The snap installed–don’t forget to install the screw then |
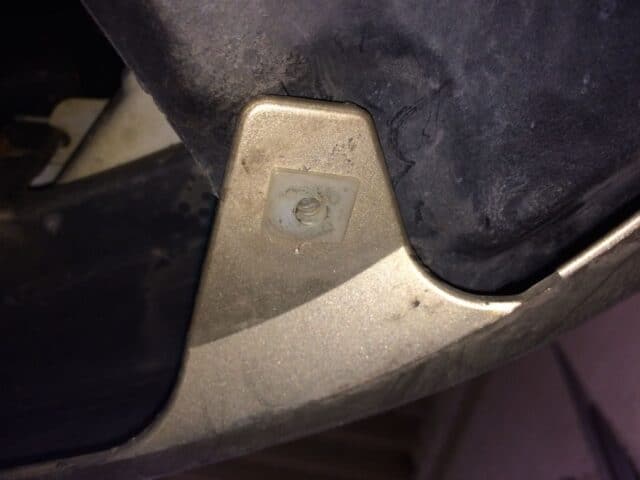
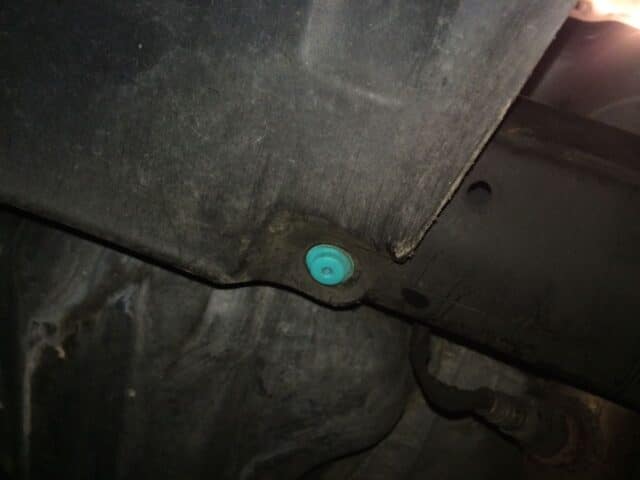
Place the black plastic into the connector in front of each wheel:
 |
| The clip in front of the wheels, ready for the screw (view from below) |
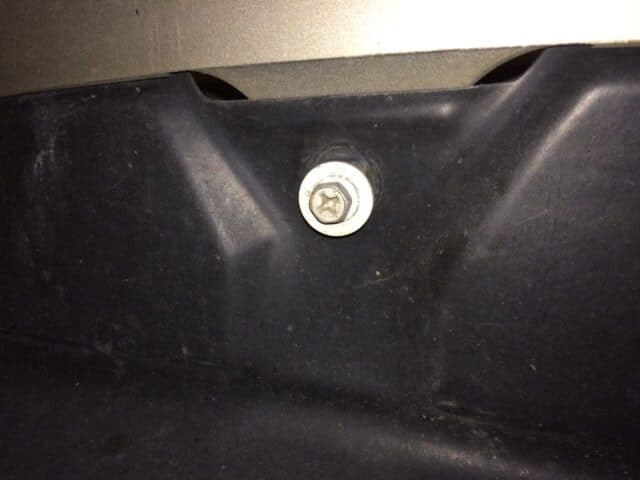
Installing the screw:
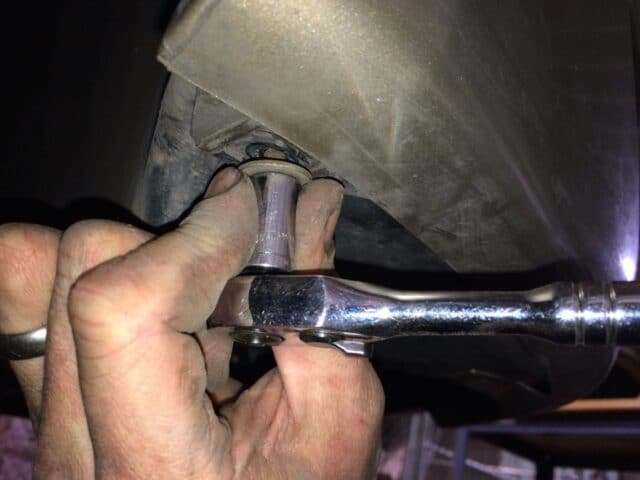 |
| Reinstalling the screw in front of the wheel |
Step 17: Reinstall the plastic cover underneath the engine.
It’s easier to look at the holes where this is connected to the van when the part is off:
 |
| Lower plastic panel, ready to be reinstalled (you are looking at the side that faces the engine) |
The front edge flanges of the black panel tucks under the front bumper:
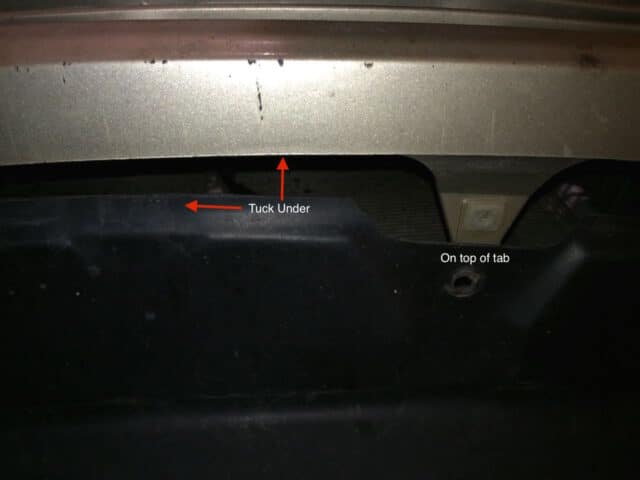 |
| Reinstalling the black plastic panel underneath the bumper |
This is what it should look like:
 |
| Lower plastic panel correctly installed and tucked under front bumper |
I have lost some of the original clips so I used an extra plastic door panel retainer clip to hold this in place:
 |
| Using interior door panel clips to hold this lower panel in place |
Done! Please let me know in the comments if this tutorial helped you repair your Sienna!
All My Toyota Sienna Posts:
- How to Change the Air Conditioner Display on a 2004 Toyota Sienna From Metric to English
- How to Replace the Front Struts on a FWD 2004 Toyota Sienna
- How to Change the Air Filter on a 2004 Toyota Sienna
- 2004 Toyota Sienna XLE DVD Entertainment System Does Not Display Video After Turning Vehicle Back On
- How to Fix Sienna Dome Lights Randomly Coming On And Alarm Going Off
- How to Replace the Rear Liftgate Shocks on a 2004 Toyota Sienna
- How to Change the Cabin Air Filter on a 2004 Toyota Sienna
- How to Program the Door Lock Transmitter on a 2003 Toyota Sienna
- How to Replace the Power Sliding Door Cables on a 2004-2007 Toyota Sienna XLE
- How to Prolong the Life of Your Toyota Sienna Sliding Door Cables
- How to Replace the Stereo on a 2004-2010 Toyota Sienna
- How to Fix The Spring on the Cassette Door on a 2004-2010 Toyota Sienna Stereo
- How to Program a Keyless Entry Remote for a 2004-2010 Toyota Sienna
- How to set the Time/Clock on a 2004-2010 Toyota Sienna
- Horn Won’t Work-How to Troubleshoot The Horn on a 2004-2007 Toyota Sienna
- How to Remove the Front Bumper on a 2004-2007 Toyota Sienna
- How to Replace the Starter on a 2004-2007 Toyota Sienna
- How to Replace the Thermostat on a 2004-2007 Toyota Sienna
- How to Replace the Radiator on a 2004-2007 Toyota Sienna
Amazon Associate Disclosure: As an Amazon Associate I earn from qualifying purchases. This means if you click on an affiliate link and purchase the item, I will receive an affiliate commission. The price of the item is the same whether it is an affiliate link or not. Regardless, I only recommend products or services I believe will add value to Share Your Repair readers. By using the affiliate links, you are helping support Share Your Repair, and I genuinely appreciate your support.
Thank you so much.
Perfectly explained. Niece hit a deer and destroyed one headlight and all the plastic. I ordered the parts and used your repair guide to install everything. Saved me a ton of time. Thanks!!!!
Many thanks for your outstanding explanation, indeed it is the only place to have in the whole internet,
sincerely appreciated
Glad you found what you needed! Thank you for leaving a comment and good job on fixing your van!
Wow. This was a big help. I had to replace my ’06 bumper cover and just walked through your instructions without any issues. I owe you a beer.
Thanks for your comment Dan, I’m glad I was able to help.
Can’t remove bumper from fender. My 2004 Sienna is different. Where you have 3 tabs to release mine has some type of connector about one inch in from wheel well and another near the front of the seam. Can’t figuar out how to release these and separate the bumper from the fender? Any help would be appreciated.
John,
Thanks, this was an excellent write-up. The only thing I would add is that the plastic clips in Step 3 for my 2004 Sienna just needed the cap screw head rotated so that the groove was horizontal. Then you can lift it out with a small flat head screw driver. I look forward to reading any other write-ups you have of the Sienna.
Thanks Chuck for taking the time to share. I have added that tip to Step 3 of this article and in Step 11a of the parent article on how to replace the radiator: Hot to Replace Radiator on 2004-2010 Toyota Sienna
Huge help. Had to replace hood latch, which is just 3 bolts, but you can’t get to the bolts without removing bumper. Thanks so much.
Thanks for this great guide! I just ran into a problem that the push-fastener clips that I bought fit fine to attach the bumper grille to the metal frame of the car but are way too thick to attach the fender splash field to the bumper (you call them wheel well clips)- where do I get these?
Thanks so much for this great guide! I just ran into one problem- I bought replacement fastener push clips (https://www.amazon.com/gp/product/B00NXBSE3I/ref=oh_aui_detailpage_o03_s00?ie=UTF8&psc=1) and they fit fine for attaching the bumper grille to the metal frame of the car but were too thin for attaching the fender splash shield to the bumper (you refer to them as wheel well clips)? Where do I get those?
Here's a link to the center retainer pins for the front wheel well clips: http://amzn.to/1TuPV9a
John,
First of all, I'm really glad I found your post, it gave me the courage to take on this project. During the last winter polar vortex I bumped into a pile of snow and it shattered by 2007 Toyota Sienna's front bumper. I did a little research and found this article and a replacement bumper on eBay for about $300, painted and shipped! After reviewing this article and keeping it close at hand during the work I removed and replaced my bumper in less than 2 hours.
Two things to add to your exhaustive review. If you are replacing only the bumper and are not removing the radiator, there is no need to drain the coolant. Second, if you have a "smart key" system, you will need to disconnect the two sensors in the bumper – do this when removing the fog lamp connectors. If you have are using a replacement bumper, you may need to cut out the hole for the sensor – there was a pattern for mine on the inside of the bumper. In my case, this added about only 25 minutes to the job to grab the tools and cut the holes.
Great write up! Your insight gave me x-ray vision and made the bumper removal a breeze!
Thanks again,
Keith
Thanks so much for sharing Keith. The bumper was the hardest part of the radiator repair but only because NO ONE else on the entire internet tells you how to do it. The youtube videos of radiator replacements skip it like it's something simple like taking off a tire or something. Hello!?!?! What about telling us how to do the hardest part!!! So I'm glad to be the one helping people out. I'm glad you were able replace your bumper and save a lot of money! It took me all day to do it without anyone's help the first time! –John
Now I understand why you asked about draining the radiator–I'm going to clean up this page right away. I had copied and pasted some of this article from the complete radiator repair article. I figured some people would search for just the bumper removal but I left a few remnants of the other post on this article. Sorry about that!
Great DIY read, I'm getting ready to attempt this myself. One questions, at what point do you need to drain the antifreeze?
Thanks!
Keith, thanks for your question, good question. I'd get it started draining as soon as you remove the lower black cover from below the bumper/engine. I have actually written up the entire radiator replacement on the following page, and that includes the order you should perform the steps: http://www.johnfixesstuff.com/2014/12/how-to-replace-radiator-on-2004-2007-Toyota-Sienna.html
Ahhh, I see why you were asking me when you are supposed to start draining the radiator, I'm sorry! I wrote up the entire radiator replacement tutorial and then parted it up into the individual repairs and didn't delete some of the stuff about draining the radiator. I'll clean up this post to get rid of the radiator replacement items. I apologize for that! Thanks again for commenting! –John