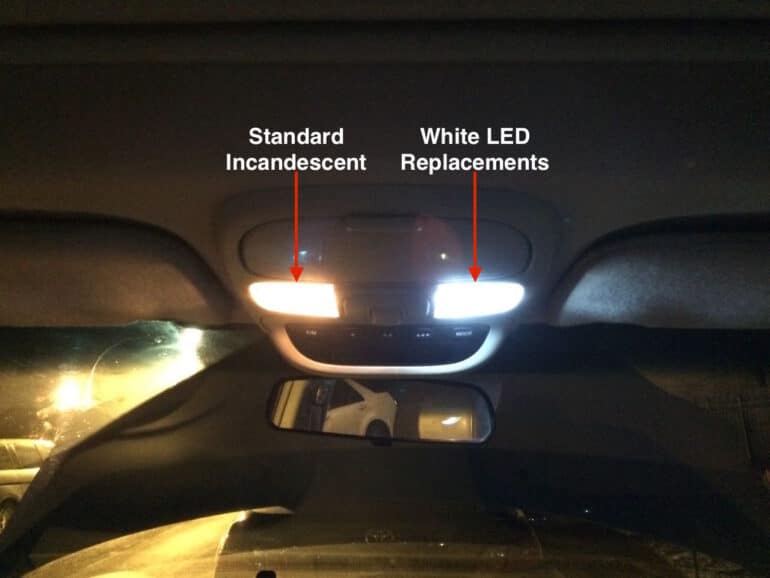
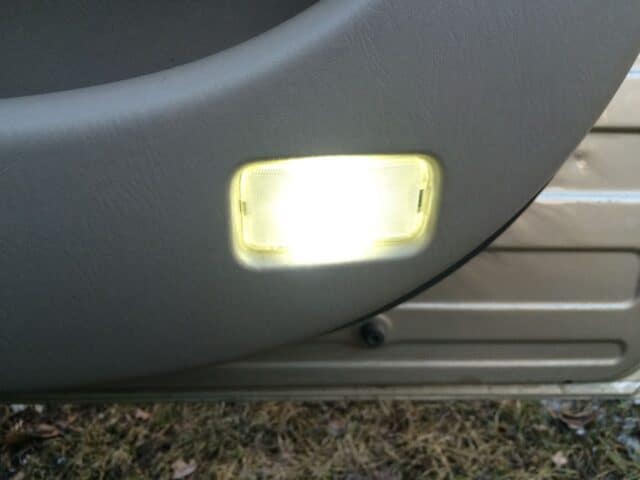
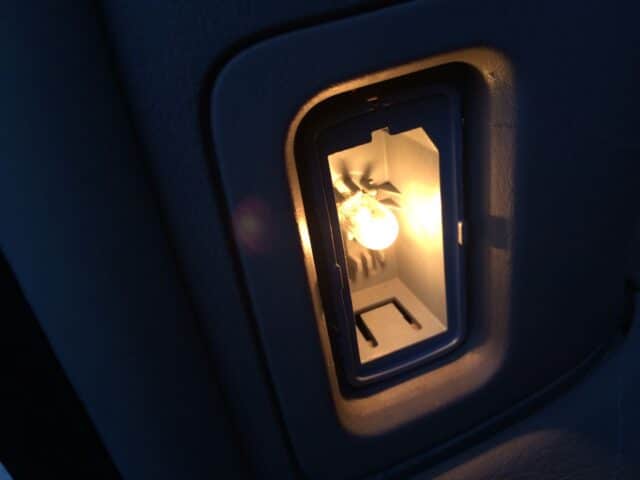
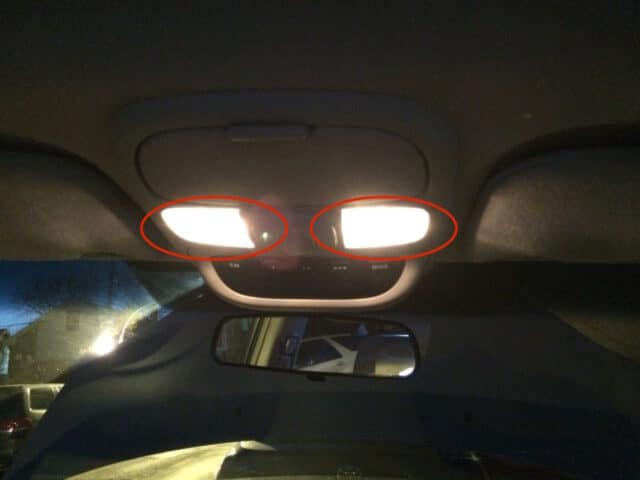
In this article I show you step-by-step how to install LED bulbs in each of the interior light fixtures of your Sienna, including how to safely remove each lens. I have been trying to transition to LED lighting wherever I can, for power conservation, and for brightness as well. I had wanted to swap out the bulbs in my 2004 Toyota Sienna Minivan for some time but wanted to buy the entire set in one package. I found a set on Amazon.com that were highly rated: Classy Autos White LED Lights Interior Package For Toyota Sienna (11 Pieces). Here’s another “comparison shot,” which shows the difference these LED bulbs make:
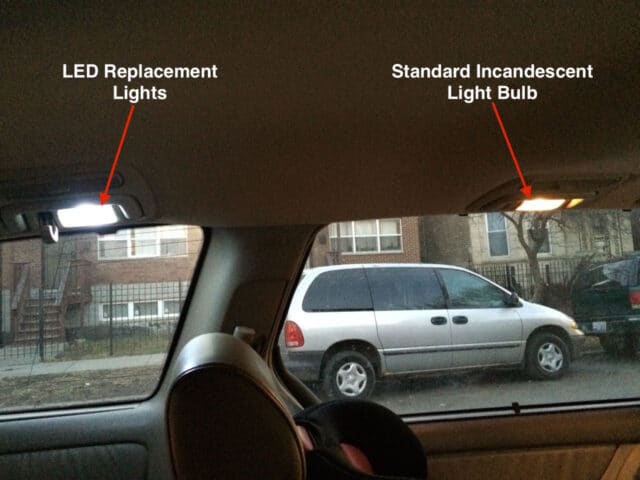 |
| Comparison of brightness and color of LED bulb (left) and Incandescent (right) |
How to Replace Sienna Dome Lights With LEDs 2004-2010 Toyota Sienna
Hardware:
- 2004-2010 Toyota Sienna
Tools Needed:
Parts Needed:
- White LED Lights Interior Complete Replacement Package For Toyota Sienna (11 Pieces)
This set includes all the bulbs you need, 11 LED replacement bulbs total: 2 map lights, 4 dome lights, 4 courtesy/step lights, and 1 cargo area light. - Electrical Tape
Once I received them I discovered that even though they were specifically for the Toyota Sienna, there were essentially no instructions for the replacement of the 11 different bulbs that I wanted to replace. This is what came with the LED’s:
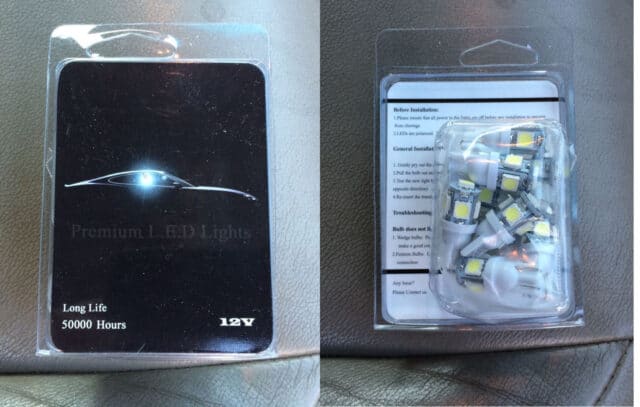 |
| Front and back of packaging |
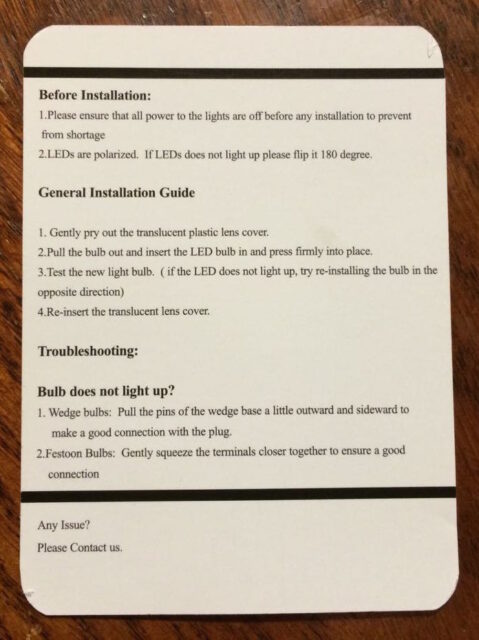 |
| Package Instructions |
Also included in the package I received was the following instructions sheet:
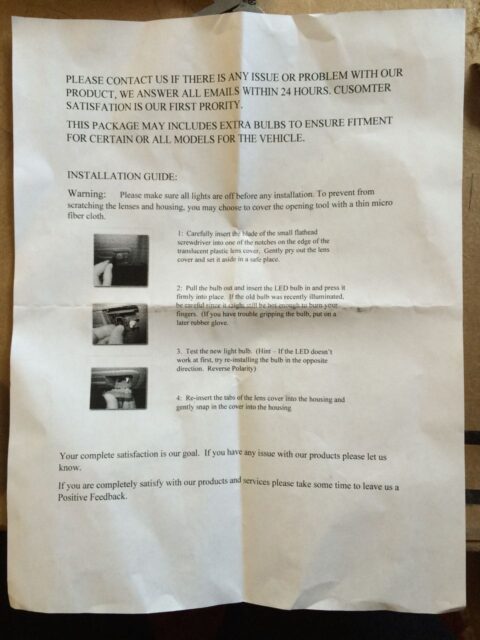 |
| Other instructions included in the package I received |
Those instructions do not cut it. On both sets it says that you should contact them if you have questions but there is NO CONTACT INFO–it’s time for another ShareYourRepair.com tutorial! Here is how to replace all the interior dome lights on a 2004-2010 Toyota Sienna…
One thing I want to note up front. If you accidentally “short out” the sockets of any of these bulbs you will blow the 10-Amp dome light fuse. This isn’t a big deal but your dome lights won’t work until you replace that fuse. I somehow shorted one of mine and had to replace the fuse and I give you the steps here:
How to Replace the 10-Amp Dome Light Fuse on a 2004-2010 Toyota Sienna
On to how to replace the incandescent dome light bulbs on a 2004-2010 Toyota Sienna with LED bulbs…
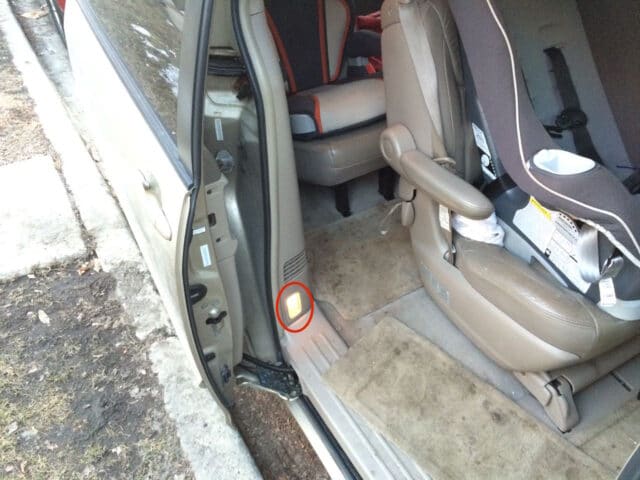
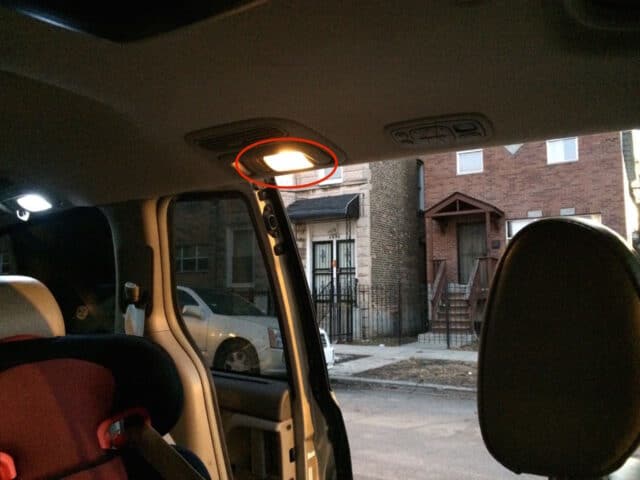
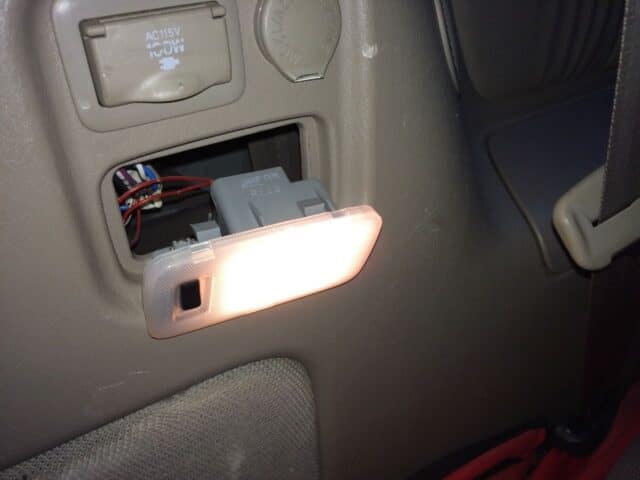
Step 1: Locate the “courtesy/step” light on the lower back corner of the driver’s and passenger’s doors:
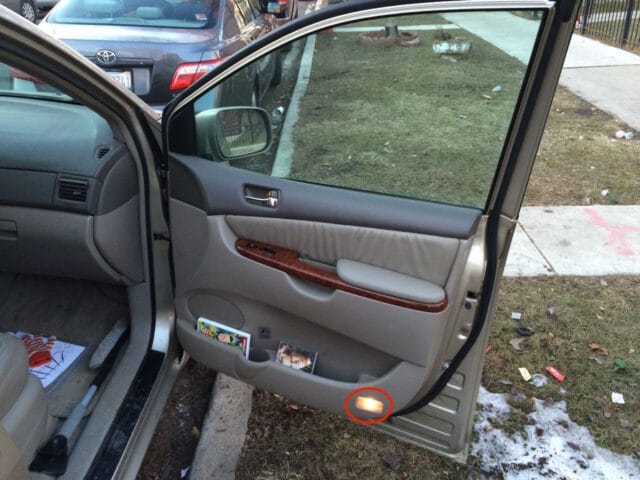 |
| Location of interior light on the front passenger door |
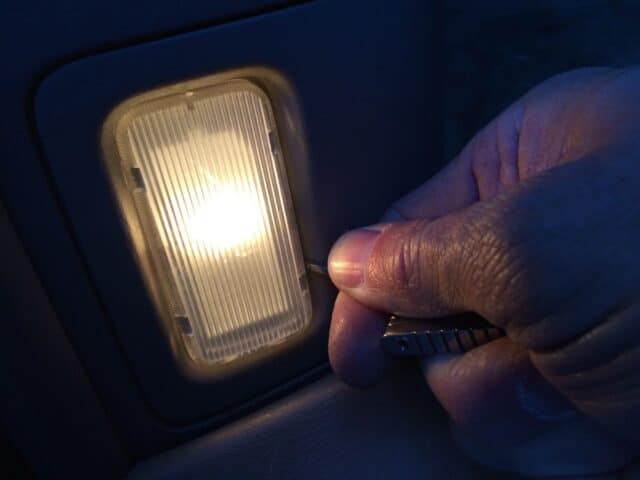
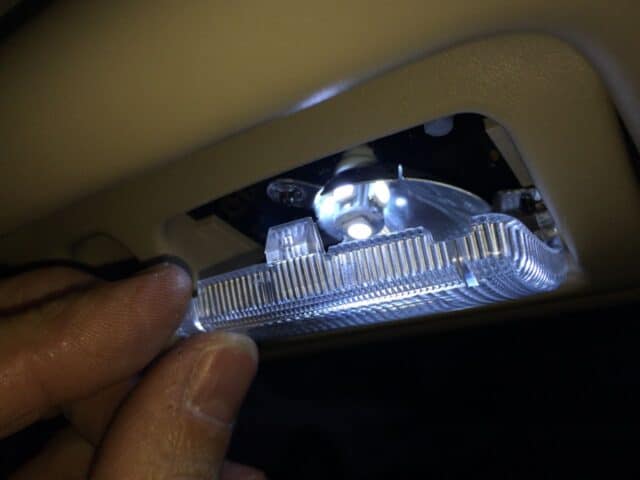
Step 2: Use a thin flat screw driver and carefully pry off the plastic lens.
You must pry on the correct end of the lens though. You can determine the correct end of the lens by looking for the large dark vertical rectangle as seen in the circle below. One thing to note is that the lens can be installed either way so the correct end to pry may be on the right or the left side of the lens.
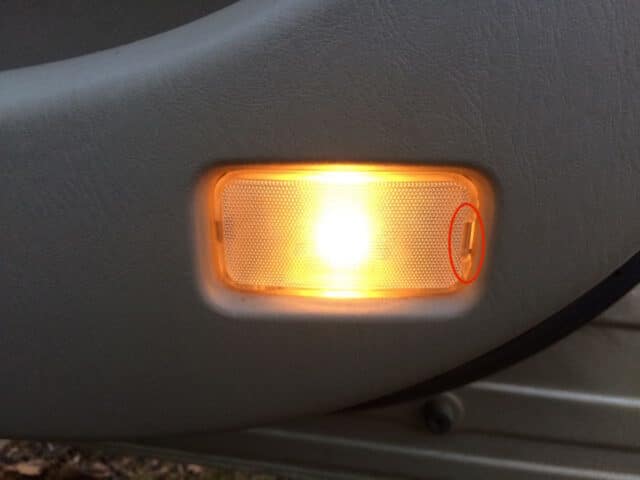 |
| Pry location for removing the interior light lens |
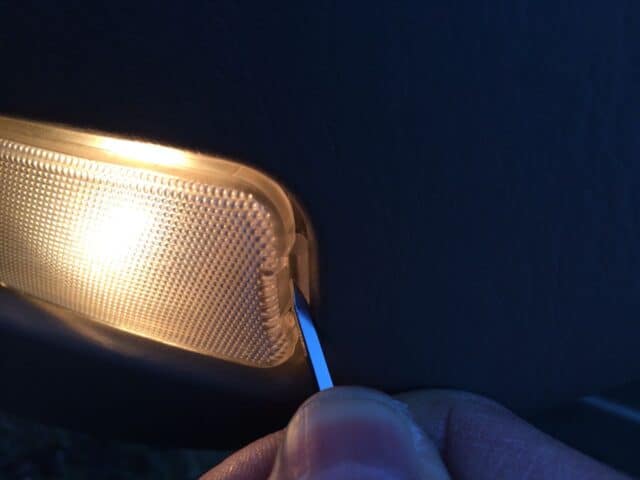 |
| Prying the lens off the front passenger interior light |
 |
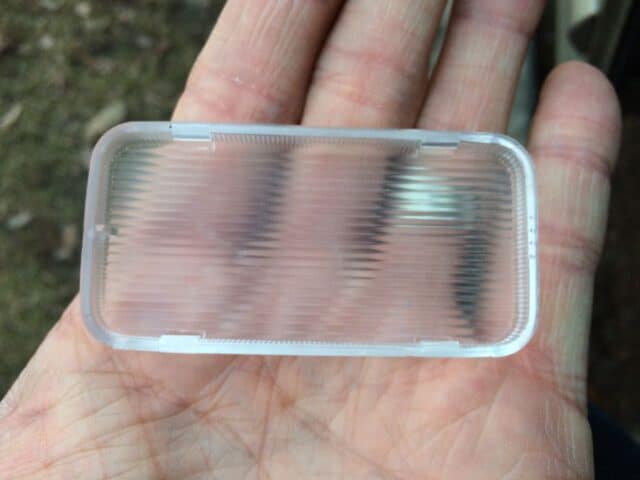
| Front passenger interior door light lens removed–note the tab on the left side and the snap on the right |
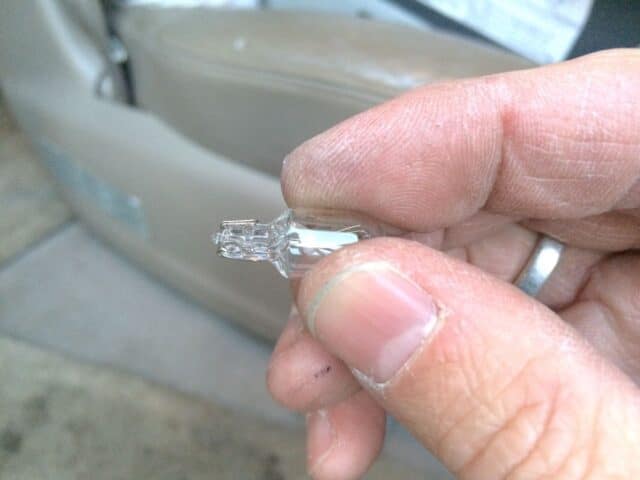
Step 3: Remove the old incandescent bulb.
Caution: I’ve been warned by a reader in the comments that it is possible to drop the light bulb down into that hole into the inside of the door. Be careful to hang on to the bulb so you don’t lose it down that hole.
The passenger- and driver-side door bulbs are held in place by two alligator-like spring jaws. All you need to do is pry the bulb straight out. The bulb won’t be hot enough to burn you but they are hot. Be careful to not short the two terminals together or you will blow a 10-Amp fuse located in the trunk. I somehow blew a fuse when changing a different bulb. Click here for instructions on how to replace that fuse. You can pry one end out first and then the other:
 |
| Prying the right end of the bulb free with a small screw driver |
 |
| One end of the bulb pried free |
 |
| 12 Volt, 6 Watt incandescent bulb |
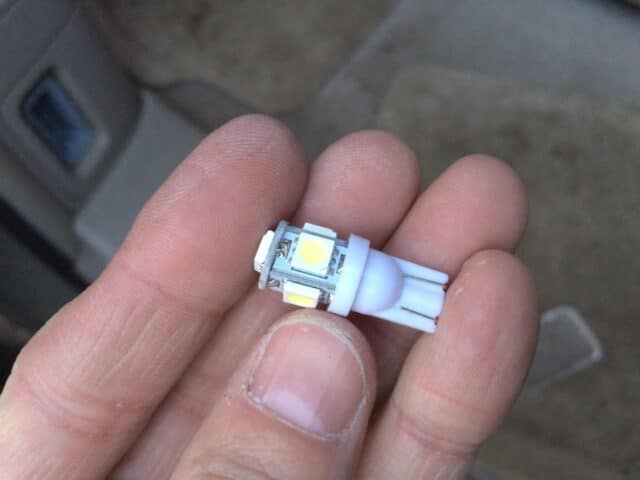
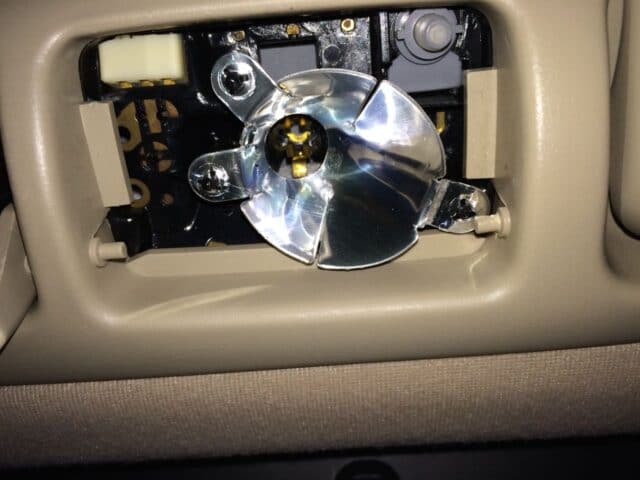
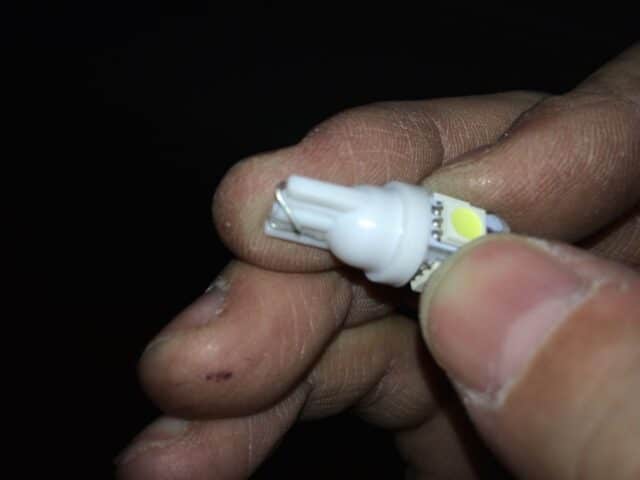
Step 4: Insert the LED replacement bulb.
There are two different size double-ended barrel-type LED bulbs in this pack, many with 12 individual LEDs and one with 4 LEDs. Use one of the bulbs with 12 LEDs as circled below:
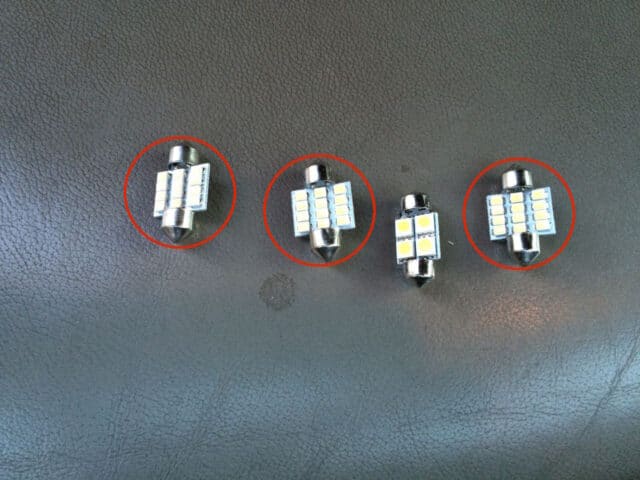 |
| Longer double-ended LEDs for front lights |
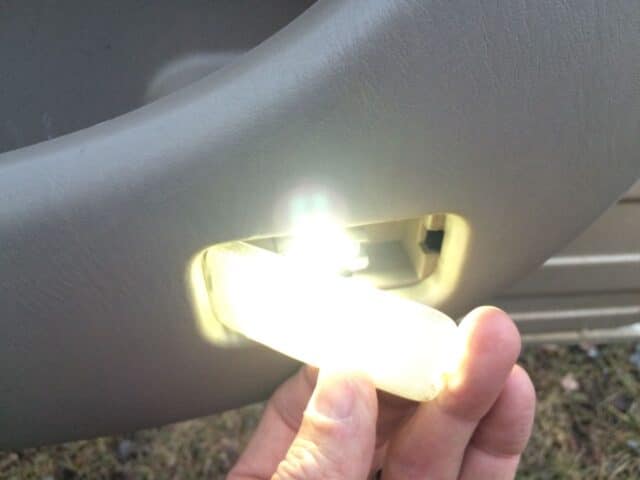
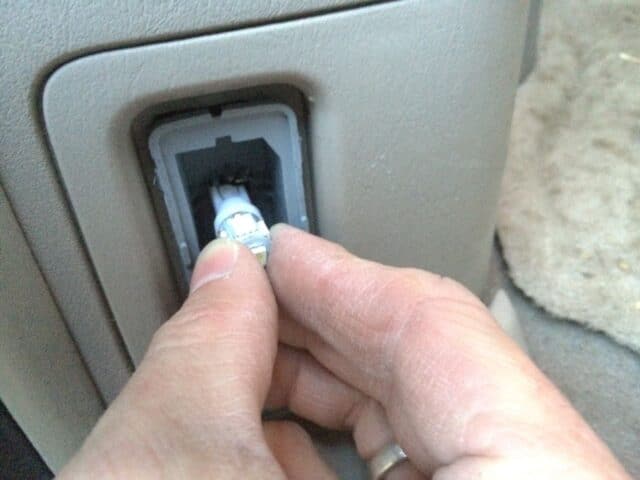
These bulbs have a polarity to them. Polarity means that one end of the bulb needs to be connected to the positive (12 volts) and the other end needs to be connected to the negative (or ground). The bulbs are not labeled and the van’s bulb sockets are not labeled either. You will need to “test” the polarity of the bulb and you can do this safely by just touching the bulb into the socket (without snapping it into place) and see if it comes on. It doesn’t damage these bulbs to insert them backwards. You also want the yellow squares to face the outside–those yellow squares are the LED lights. If the LED light doesn’t come on then flip the ends around and try it again. Once you have figured out the polarity then snap it into place. One thing to note is that I installed the incorrect 4-led bulb into this fixture the first time (as pictured below) but later discovered that the 4-LED bulb goes in the cargo light fixture because it is shorter.
 |
| LED bulb installed in front passenger door |
Step 5: Reinstall the lens.
Insert the tab into one end:
 |
| Insert the tab end into the rectangular hole first |
Then snap the lens into place:
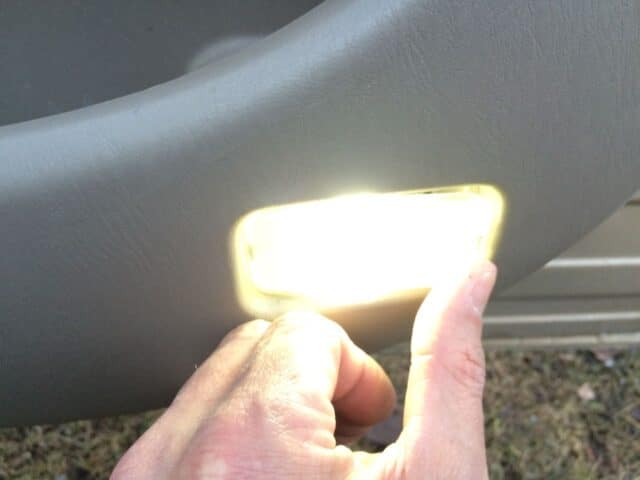 |
| Press on the other end to snap the lens into place |
 |
| LED bulb installed and lens replaced |
Repeat steps 1-5 for the driver’s side door “courtesy/step” light.
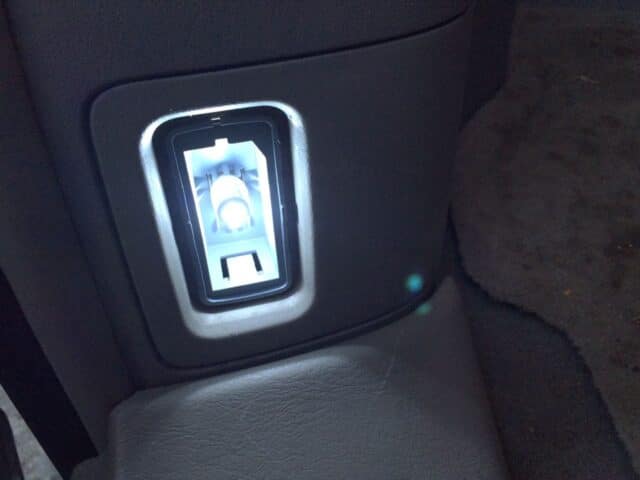
Step 6: Locate the “courtesy/step” light on the rear door post on the passenger sliding door:
 |
| Location of light on rear post of passenger side sliding door opening |
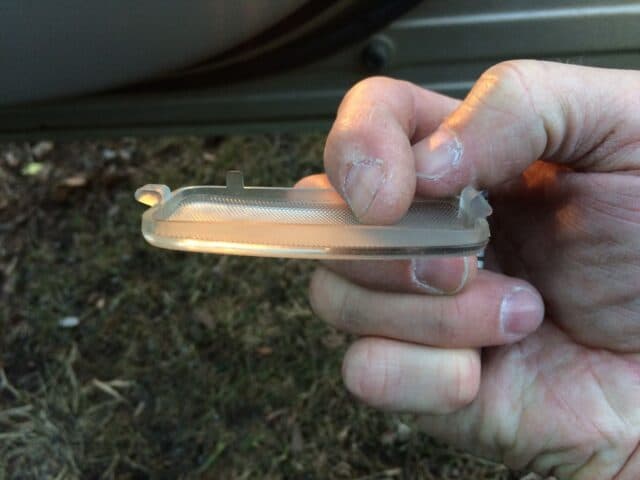
Step 7: Use a thin flat screw driver and carefully pry off the plastic lens.
This lens is a completely different design as that of the front driver’s and passenger’s door. The lens snaps onto a “box” that snaps into the door frame. The box may come out with the lens still attached to it but that is ok. You can pry on any of the four sides to pry it off:
 |
| Prying off the lens of the sliding door post interior light |
You may find that you can pry one side free and the other side will still be attached. Simply work your way around the edge with your flat screw driver to remove the lens. This is what it will look like once you get it removed:
 |
| Lens removed from sliding door post light |
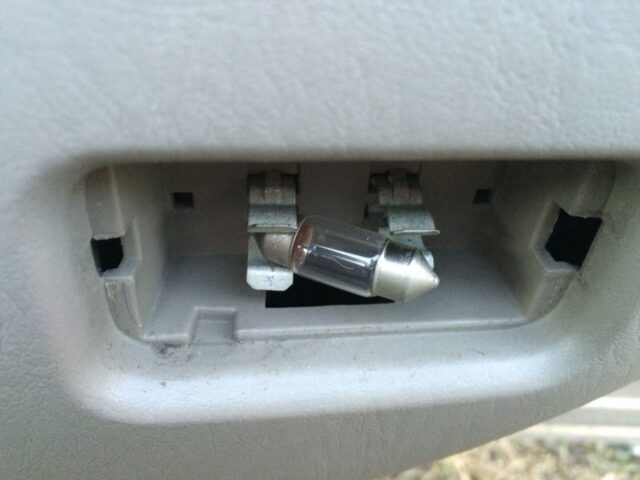
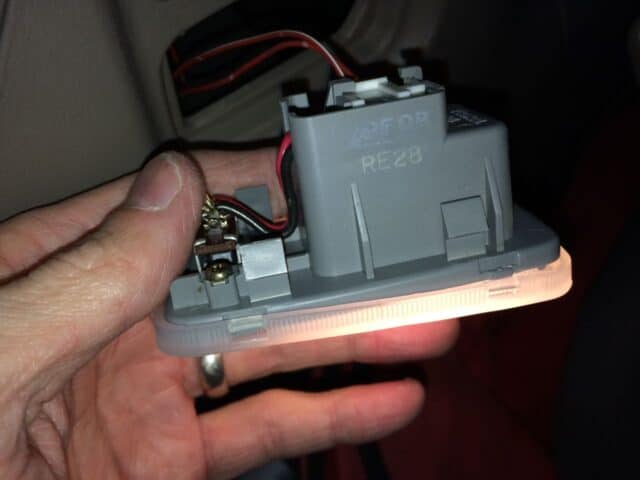
Here is what it looks like with the lens removed and the old incandescent bulb still installed:
 |
| Sliding door post light with old incandescent bulb still installed and the lens removed |
The grey “box” that is in the opening may come loose and begin to come out when removing the lens. If it does, simply push it back into the opening and it will snap into place.
Step 8: Remove the old incandescent bulb.
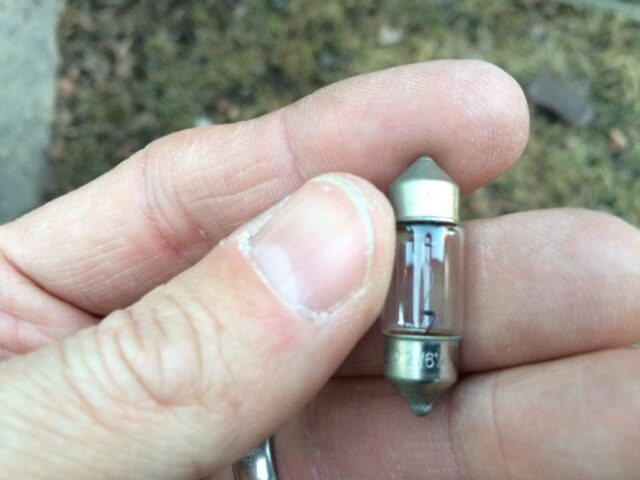
You can pull this bulb straight out. It does get hot but not hot enough to burn you. I kind of did a little “hot potato” routine with this bulb once I got it out because it was pretty warm. This is what the incandescent bulb looks like when removed:
 |
| Sliding door post incandescent plug-in type bulb removed |
Step 9: Install the LED replacement bulb.
This bulb has a polarity too so you can carefully start to install the bulb and see if it comes on. If it does not flip the bulb around and reinstall. Be careful because the two wires tend to bend out of place like the christmas-tree type bulbs do, if you’ve ever worked with them. This is what the replacement LED bulb looks like:
 |
| LED replacement bulb for sliding door post lights |
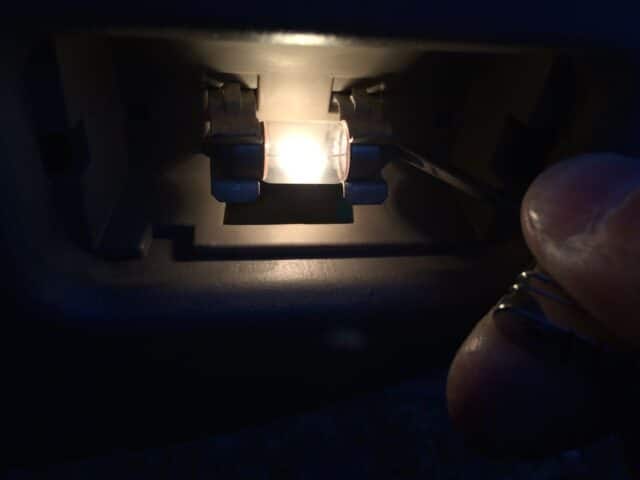
Below I am testing the polarity of the bulb. Note that the terminals of the bulb are on the top and the bottom with the bulb “socket” aligned horizontally. It did not turn on so I flipped it around.
 |
| Testing the polarity of the bulb–it didn’t turn on so I needed to flip it around |
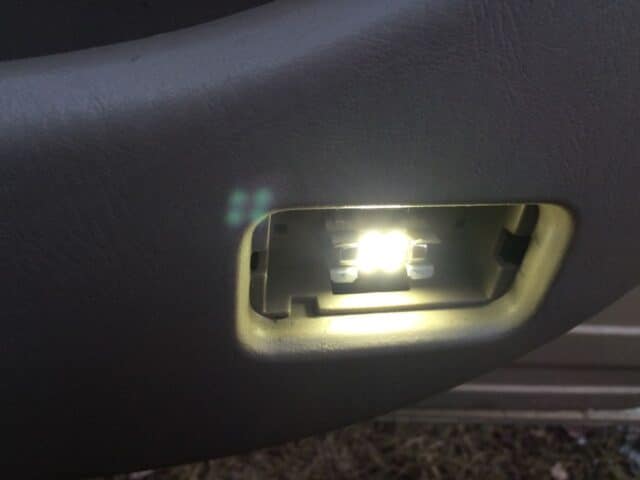
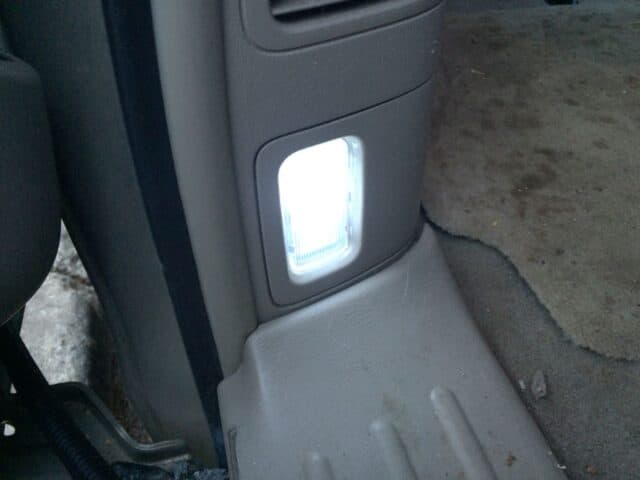
Push the bulb into place and this is what it will look like:
 |
| LED bulb installed on the rear post of the sliding door opening |
Step 10: Reinstall the lens.
You can press the lens straight onto the box and it will snap into place:
 |
| LED bulb installed and the lens reinstalled |
Repeat steps 6-10 for the driver’s side sliding door post “courtesy/step” light.
Step 11: Locate the driver’s side third-row dome light:
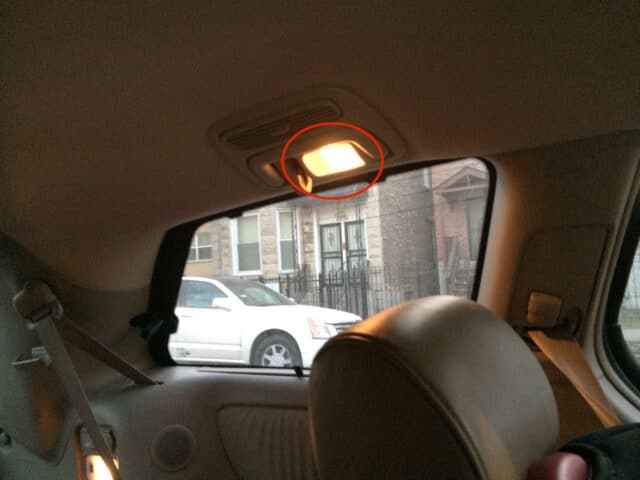 |
| Back driver’s side upper dome light location |
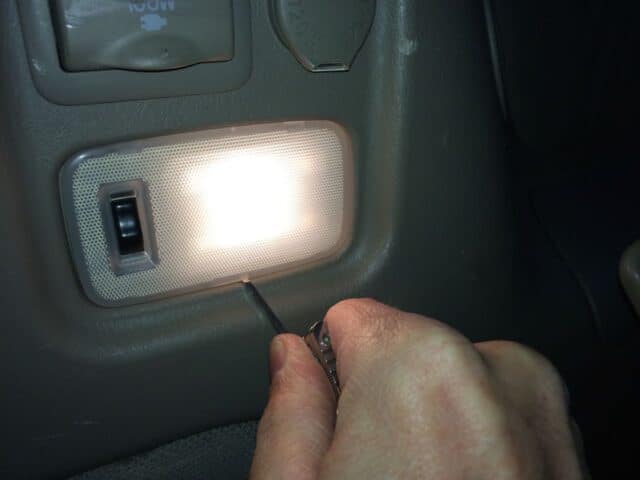
Step 12: Remove the lens.
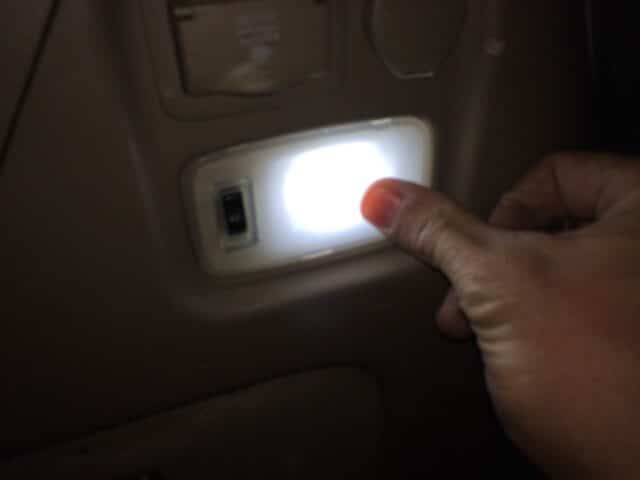
This lens is yet a different style and is held in place differently than the previous two we’ve removed so far. This lens doubles as a push-button switch. There is a dimple on the top edge where you are supposed to push and on the bottom edge it is hinged. Pry on the top edge and pry the lens “catch” away from the opening to release it. I actually pried on the side and it came off ok. It seemed like it would be easy to break these lenses but they are actually pretty resilient. This is where you should pry:
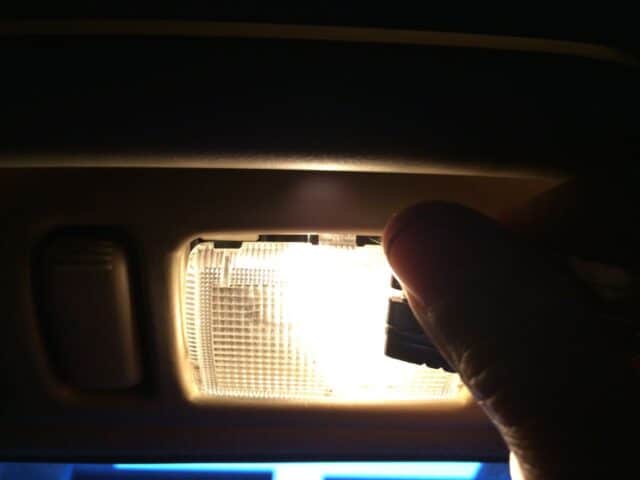 |
| Pry on the top edge of the push-button light lens |
This is what it looks like when you get it removed (the top side of the lens in the picture below was actually at the bottom in the image where it is still installed above):
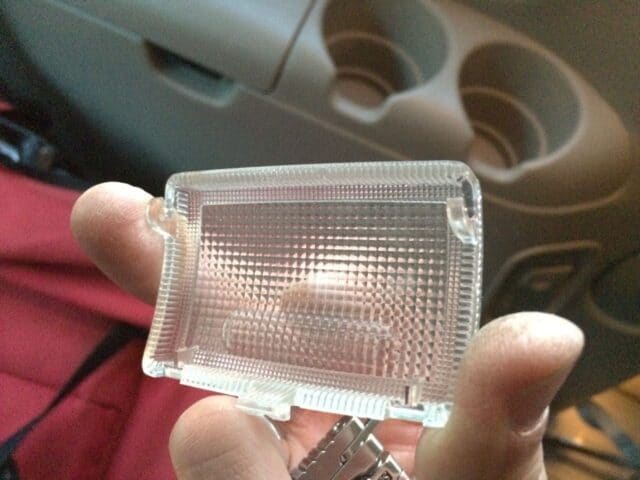 |
| Push-button type lens removed (hinged at the top, snap/catch on the bottom) |
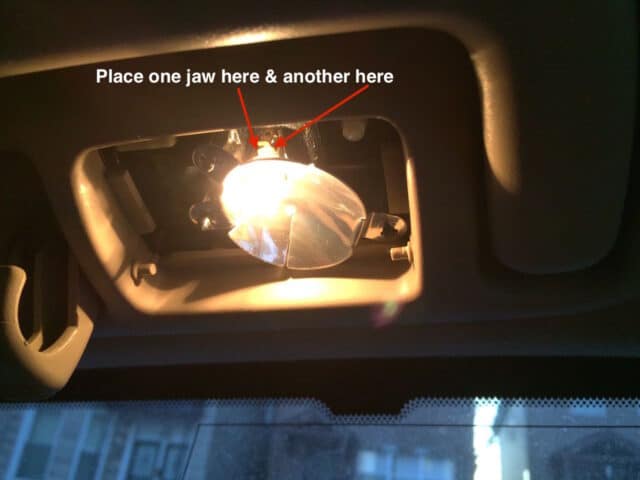
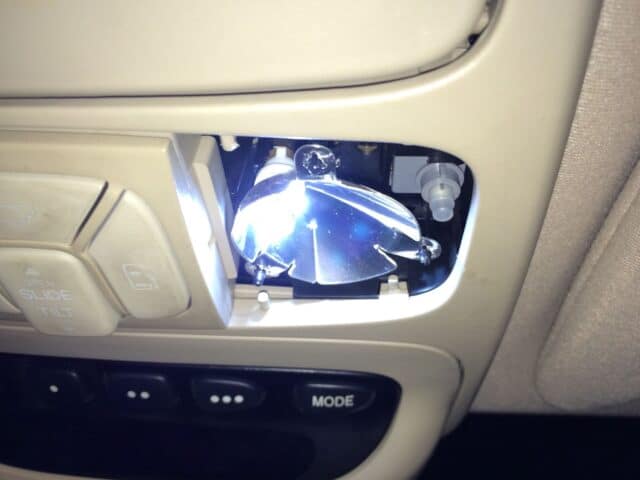
Step 13: Remove the old incandescent bulb.
This may be the trickiest part of this entire process. I could not get my fingers on the bulbs, because of the reflective lens that surrounds the bulb, in order to pull the bulb out. This bulb is the same kind as you removed in the previous bulb replacement. I considered trying to remove the reflective lens to make it easier but decided that I might break the lens in doing that. What I actually ended up doing was taking my needle-nose pliers and wrapping both jaws in electrical tape so I don’t accidentally short out the connections and then reached around the outside of the lens and eased the bulb out. Slightly open the needle nose pliers and put one point of each jaw in the location as shown below and gently ease out the bulb:
 |
| Location to pry the old bulb out |
It was at this point that I accidentally shorted out the socket and blew the fuse, even though I had my needle nose pliers jaws wrapped in electrical tape. Who knows what happened. If this happens to you, here is a link to replace the fuse:
How to Replace the 10-Amp Dome Light Fuse on a 2004-2010 Toyota Sienna
Here the bulb is removed:
 |
| Bulb removed |
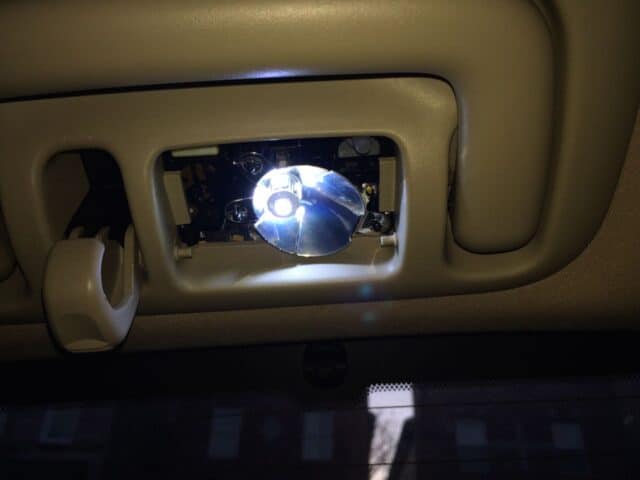
Step 14: Install the new LED plug-in type bulb.
This is the bulb you’ll be installing here:
 |
| Plug-in style LED bulb to install here |
Determine the polarity to install the bulb and just slightly insert the bulb to test whether the polarity of the bulb is correct. For this bulb the terminals will be on the left and right. If it comes on go ahead and install the bulb but if it doesn’t then flip the bulb around and test it again. Once you have the polarity correct install the bulb. Do make sure when testing the bulb that the wires do not get bent out of place when testing the bulb as seen in the picture below:
 |
| One of the wires bent out when testing the bulb |
 |
| Replacement LED bulb installed |
Step 14: Reinstall the lens.
Seat the “hooks” hinge end onto the “posts” first:
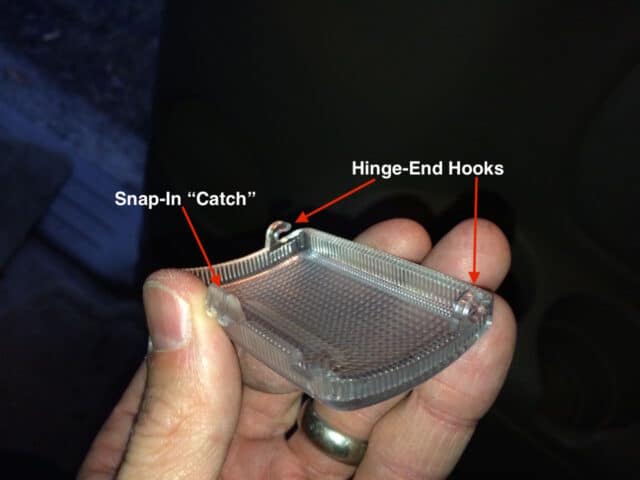 |
| Parts of the lens– hooks on one side for the hinge and a wedge-shaped snap on the other side to retain the lens |
 |
| Snap the hooks onto the two posts on either side of the lens opening |
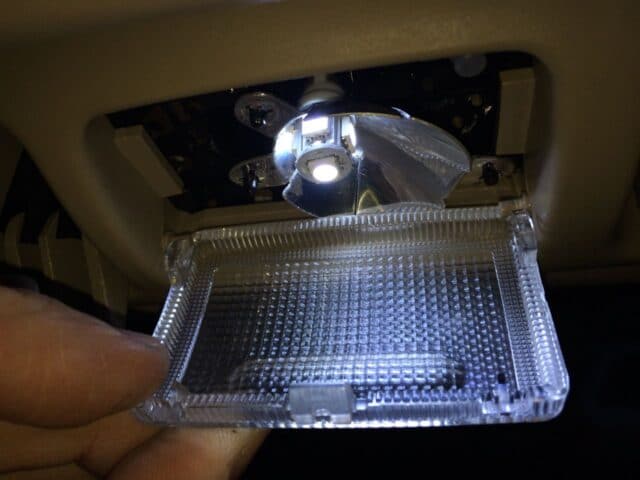
Rotate the lens closed and press the snap side into place:
 |
| With the hinge-end installed then snap the lens in place |
Repeat steps 11-14 for the passenger side third-row dome light.
Step 15: Locate the dome light above the driver’s side sliding door:
 |
| Location of driver’s side sliding door dome light |
The second row dome lights are exactly the same as the third row dome lights–they are the push-button type lenses. Follow steps 12-14 for the removal of the lens, the replacement of the bulb, and the replacement of the lens.
Step 16: Repeat steps 12-14 for the passenger’s side sliding door dome light.
Step 17: Locate the map lights on the ceiling between the driver’s and passenger’s seats:
 |
| Front center ceiling dome light location |
Step 18: Remove both lenses.
These lenses are of a different style than the other lenses in this vehicle. They too are dual-action in that they are push-button on the outside edge and are hinged on the middle edge but they are retained in a slightly different way than the lenses on the doors. To remove them gently pry in the seam on the outside edge in the location indicated below:
 |
| Locations to pry the front ceiling dome light lenses off |
This is what they look like when you get them off, with the left side being the edge that will be toward the center of the car. Notice there is a tab that tucks into the opening:
 |
| Center front ceiling dome light lens removed |
Step 19: Remove the old incandescent bulb.
This bulb removes exactly the same as the other ceiling dome lights and has the reflector surrounding the bulb. Refer to step 13 for using a needle-nose pliers with its jaws wrapped in electrical tape to reach around the outside of the lens to ease the bulb out.
Step 20: Install the replacement socket-style LED bulb on both lights.
Check the polarity before inserting each bulb first and make sure the wires don’t get bent out when testing the bulbs. Here I’ve installed the right LED bulb:
 |
| LED bulb installed in front center ceiling dome light |
Step 21: Reinstall the lenses.
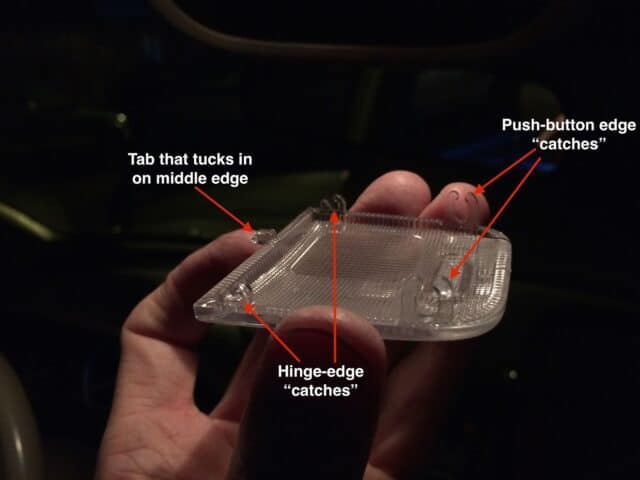
These lenses snap onto 4 posts that stick out of the opening. Tuck in the tab on the middle side edge (the edge with square corners versus the round corners that point toward the outside of the van) and then snap the hinge side into place:
 |
| Reinstalling the lens on the front middle ceiling dome light |
Here the hinge-edge has been snapped in and all that is left to do is to press the other edge straight up and it will snap into place:
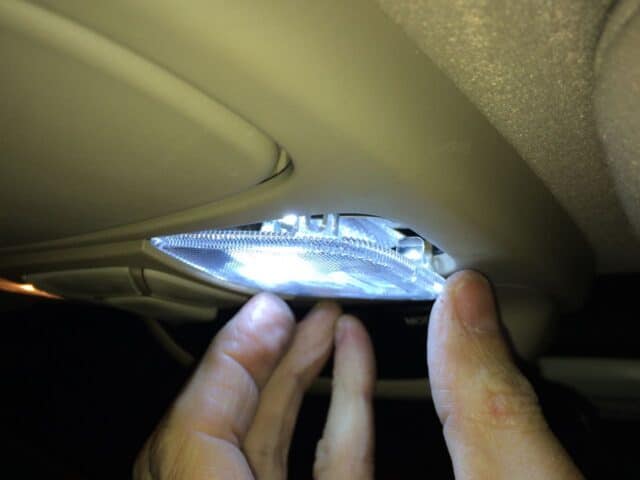 |
| Ready to snap the push-button (outside) edge into place |
Both the left and right upper center dome lights are identical (except for being mirror images of each other.
Step 22: Locate the cargo light.
It is on the driver’s side of the vehicle and can bee seen here with the tailgate open:
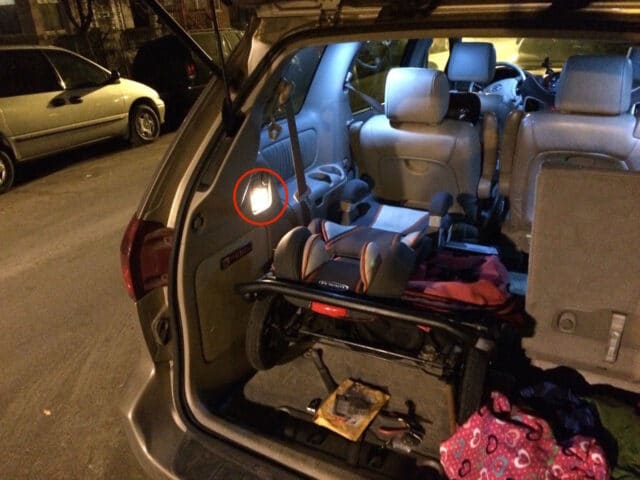 |
| Location of cargo dome light |
Step 23: Remove the lens.
I pried on the bottom edge as seen here:
 |
| Carefully pry along the bottom edge |
The entire light fixture came out, which is totally fine. Once you get it out you can pry the lens off the fixture by working your way around the edge.
 |
| Cargo light fixture pops right out |
Pry the lens off the fixture by working your way around the lens with a flat screw driver:
 |
| Removing the lens from the fixture |
Here’s what it looks like with the lens removed:
 |
| Cargo light fixture with lens removed |
Step 24: Remove the incandescent bulb.
This bulb is held in place differently than all the others in that it is held by the points on its very ends. I just inserted my screw driver behind one end of the bulb and pried out and it released pretty easily.
Step 25: Snap the cargo lamp assembly back into place in the plastic interior body of the van.
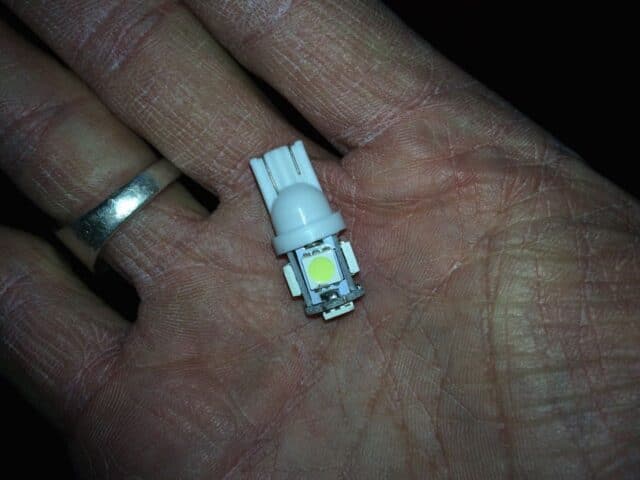
Step 26: Install the replacement LED bulb.
This bulb is different from all the rest in that it is slightly shorter and has only 4 yellow LEDs on the board:
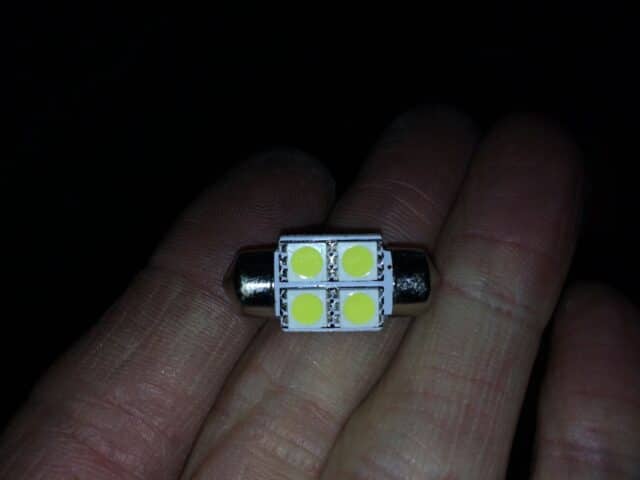 |
| Cargo LED bulb with 4 LEDs |
This bulb was a bit trickier to install than the other “barrel” type. First check the polarity by just touching it to the spring terminals to ensure that it lights up. If it doesn’t then flip it over and try it in reverse. Here’s a what it looks like installed and lit up:
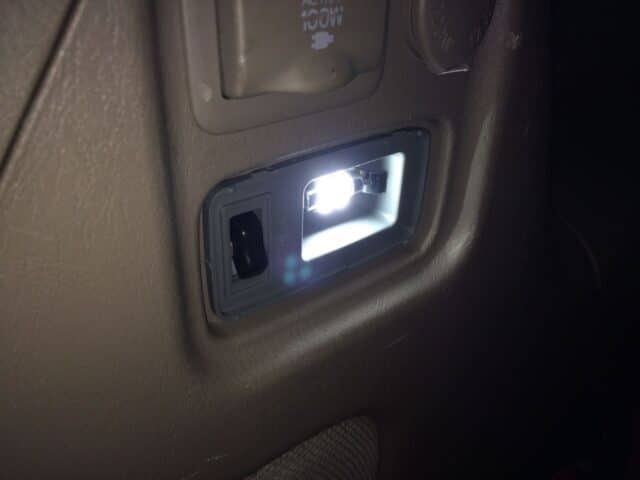 |
| Cargo light LED installed |
Step 27: Snap the cargo lens back into place.
It snaps straight on:
 |
| Reinstalling the cargo light lens |
Now you are done! Here’s what it will look like with all the LED’s installed–very nice!
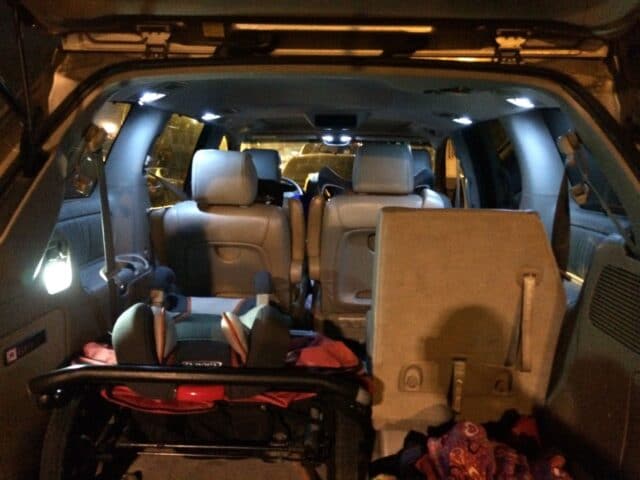 |
| LED’s are whiter and brighter than incandescents! |
These LED bulbs are even dimmable, as you can see in the short video below where I demonstrate what happens when you double-lock the doors with your keychain remote:
Amazon Associate Disclosure: As an Amazon Associate I earn from qualifying purchases. This means if you click on an affiliate link and purchase the item, I will receive an affiliate commission. The price of the item is the same whether it is an affiliate link or not. Regardless, I only recommend products or services I believe will add value to Share Your Repair readers. By using the affiliate links, you are helping support Share Your Repair, and I genuinely appreciate your support.
Found this when I was looking for small improvements that I could make to my Gen2 Sienna. Fortunately there re LED bulbs available now that are not polarized and can be put in either way.
Also, you can get the 168/194 style bulbs with the light emitters mounted on a PCB so that there is no issue with potentially bending the wires
Thanks for this great and detailed writeup. I installed the Classy Autos bulbs in my 2005 XLE in about 20 minutes. Very straightforward. It looks like the kit now contains five identical barrel bulbs (for doors and rear cargo light) — the cargo light bulb was a bit wider than stock but still fit into the mount without issues. I also found that I was able to fairly easily remove the reflector-surrounded bulbs by gently prying on the narrow edge of the base of the bulb with my narrow straight-head screwdriver while grasping and wiggling the bulb until it came loose.
Thanks for the feedback Jacob. Doesn’t your Sienna look nice with bright white LED lights?
Man, I wish I’ve read this article before.
I am still trying to figure out about my sliding door, but as I almost attempted the slinding door actuator fix, I thought I’d replace the bulbs to LED bulbs, so I ordered some and went on with the replacement. The replacement was ok, but I am short with bulb type LEDs and left with too many barrel type LEDs. I should have ordered that Sienna LED bulb package!
Anyway, I’ll go on and replace my front doors’ courtesy lights, which I didn’t replace last time.
Thanks.
One minor update to this extremely helpful DIY:
I just ordered and installed the recommended bulb kit, and the 3 barrel-type LEDs in the kit I received (see Step 4 and Step 26) were all identical. They all went in fine.
After reading through your well-illustrated steps, the install was a snap. Many thanks!
Thanks for leaving a note and for the feedback. Now when people get into your van they will say, “Wow, it’s so bright in here!?!?” You will really notice a difference.
I just performed this myself after seeing it over the weekend. Just bought a 2010 Sienna LE, and in our old minivan the boys frequently left a light on and drained our battery. Figured this would be a cinch.
Bought the LED package from the link above. Other than no paperwork or instructions (of ANY kind), the only difference with the package was that it came with three “festoon” (metal on both ends) bulbs that were all 4-LED, no 12-LED. One of them was a very very tight fit into the cargo light in the trunk (bulb actually bent a bit) but I got it to go in and stay. Should be okay.
The passenger reading lights (2nd and 3rd row) were indeed a challenge, as well as the map lights up front. I couldn’t get my needlenose to get in there, so I basically took some duct-tape and stuck it to the bulbs to pull/wiggle them out. That worked.
Everything took me 30 minutes to finish. To minimize the possibility of shorting the 10-amp fuse, I kept turning the master light switch off when dealing with pulling out the bulbs (also kept them cooler to touch), and then turned it back on to install the LED bulbs and test polarity. Didn’t add much time.
THANK YOU for the instructions and links. Everything worked out great!
One additional note – the driver/passenger front door lights – be careful when pulling out those festoon bulbs, if you happen to drop one (like I did) it can fall into the little hole and rattle around in the bottom of the plastic door panel.
Thanks for the feedback Jason. I added a note of caution on step 3 so other people don’t drop the bulb down into the door.
Thanks again John. After successfully installing my new cable in the door, I “tackled” the old lights and installed the LEDs. You’re right: those lamps above the back seats are super hard to remove! I used two tiny, flat-head screw drivers wrapped in tape to help dislodge them. Definitely not easy….but possible.
Tell me: ever try to replace the headlights with LEDs? I searched you site but didn’t see any posts on it. After 8 years, I feel the beams aren’t as powerful as they once were.
Thanks again!
Thanks for sharing Ludwig. I have done some research on putting LEDs in my headlights but didn’t end up doing anything. I cannot even remember what I learned at the time about the ease or possibility of doing it. Your dim headlights could be a product of yellowing headlight lenses. I have resurfaced my headlights a couple times. I didn’t write that up but the instructions are pretty good that come with the kits. If you ever run into water in your right headlight, I’ve written how to repair that: How to Fix Moisture in Headlight-Toyota Sienna